Recent posts


Shop the article
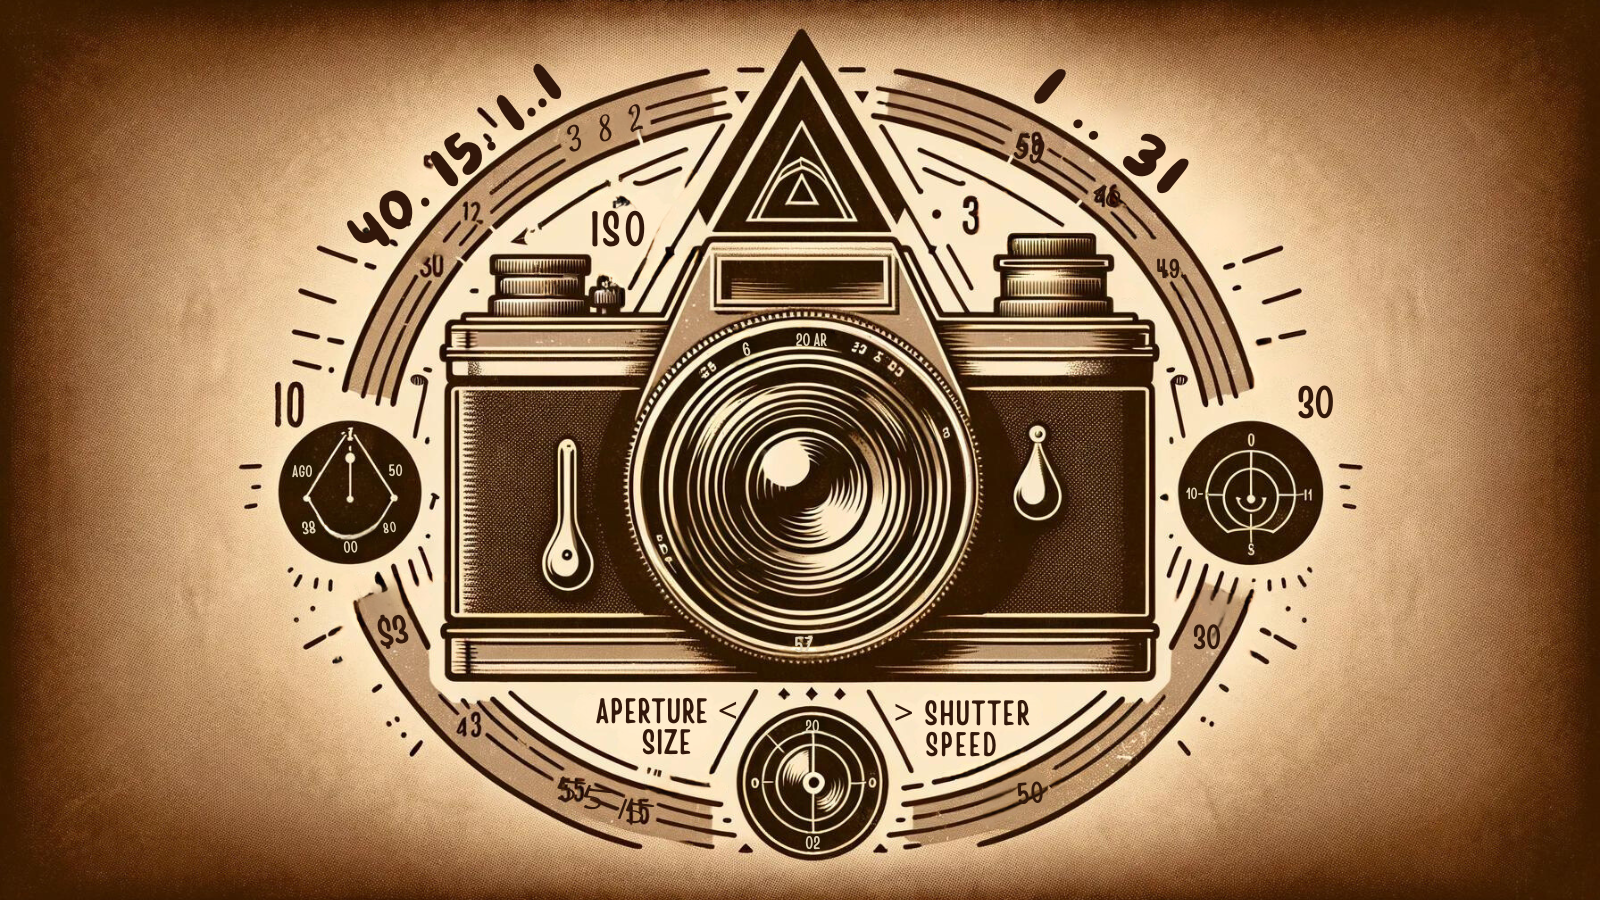
Mastering Film Photography: A Deep Dive into the Exposure Triangle
One of the first steps on everyone's film photography adventure is realising the importance of the exposure triangle: ISO, aperture, and shutter speed. This trio of interacting settings governs the essence of every photograph you'll ever capture, blending science with art to create stunning imagery.
In this article, we'll unravel the mysteries of the exposure triangle, guiding you through the interplay of ISO (film speed), aperture and shutter speed, to enhance your film photography skills. Mastering these fundamentals will elevate your craft to new heights so let's step into the light and begin!
Introduction to the Exposure Triangle in Film Photography
The exposure triangle is a fundamental concept in film photography that you simply can't overlook. It consists of three crucial elements: ISO, aperture, and shutter speed. Each of these components plays a vital role in determining the final look of your photograph. The beauty of the exposure triangle lies in its balance. Adjusting one element requires compensatory changes in the others to maintain the desired exposure.
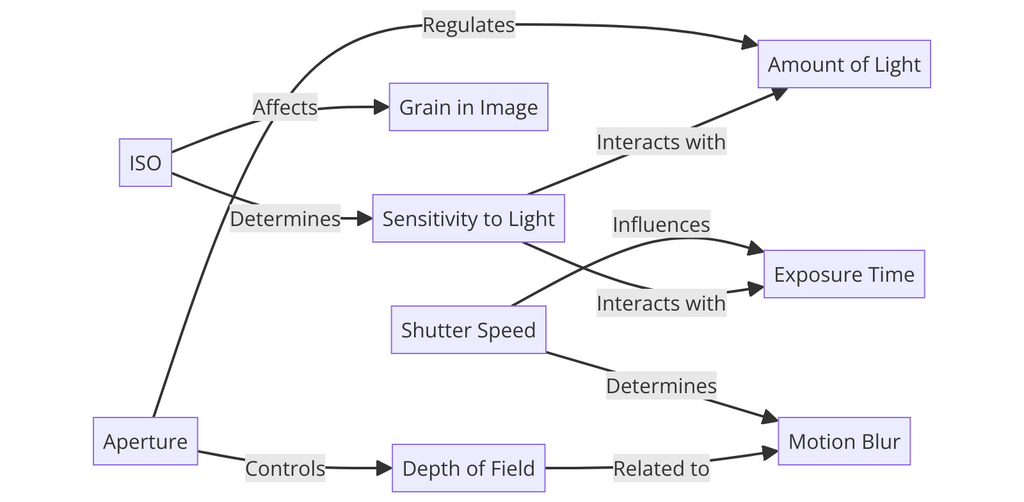
ISO, or film speed, is all about the sensitivity of your film to light. A higher ISO number means the film is more sensitive, allowing you to shoot in lower light conditions, but at the expense of increased grain in your images. Aperture, on the other hand, controls how much light enters your camera lens. It also affects the depth of field, which determines how much of your shot is in sharp focus. Lastly, shutter speed dictates how long your camera’s shutter remains open to expose film to light. It's a critical factor in capturing either crisp, frozen moments or beautiful motion blurs.
Understanding the interplay of ISO, aperture, and shutter speed is not just about getting the right exposure. It's about making artistic choices to bring your creative vision to life. Each setting opens up a world of possibilities, allowing you to manipulate light and time in your imagery. By mastering the exposure triangle, you'll gain control over the mood, clarity, and storytelling elements of your photography. Some cameras - including the upcoming new Pentax film camera - have auto exposure to make these decisions 'for you' but it's imperative to understand the basics so you know what your camera will be doing.
One of the additional beauties of film photography is that - unlike digital - it is very difficult to change the ISO mid-roll! So some of our creative choices are determined in advance, and then we are confined to a smaller sub-set of choices to get the shot we need. Fortunately if you are reading this then you are unlikely to be intimidated by the restrictions of analogue photography - congratulations on your excellent life choices!
Stay tuned as we delve deeper into each component of the exposure triangle, starting with the all-important ISO, to help you harness the full potential of your film camera.
1. Understanding ISO in Film Photography
ISO is a term that often mystifies many newcomers to film photography, but it's a concept that's integral to mastering the craft. In its simplest form, ISO represents the film speed, or how sensitive your film is to light. It's a crucial element that can significantly impact the quality and aesthetic of your photographs.
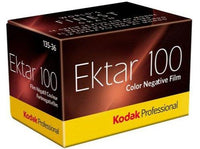
A lower ISO number, like ISO 100, means the film is less sensitive to light. And indeed low ISO films are perfect for bright, sunny days where there's plenty of light. However, a lower ISO also (generally) means finer grain, resulting in sharper, clearer images. This makes it an excellent choice for detailed landscapes or portraits where clarity is key.
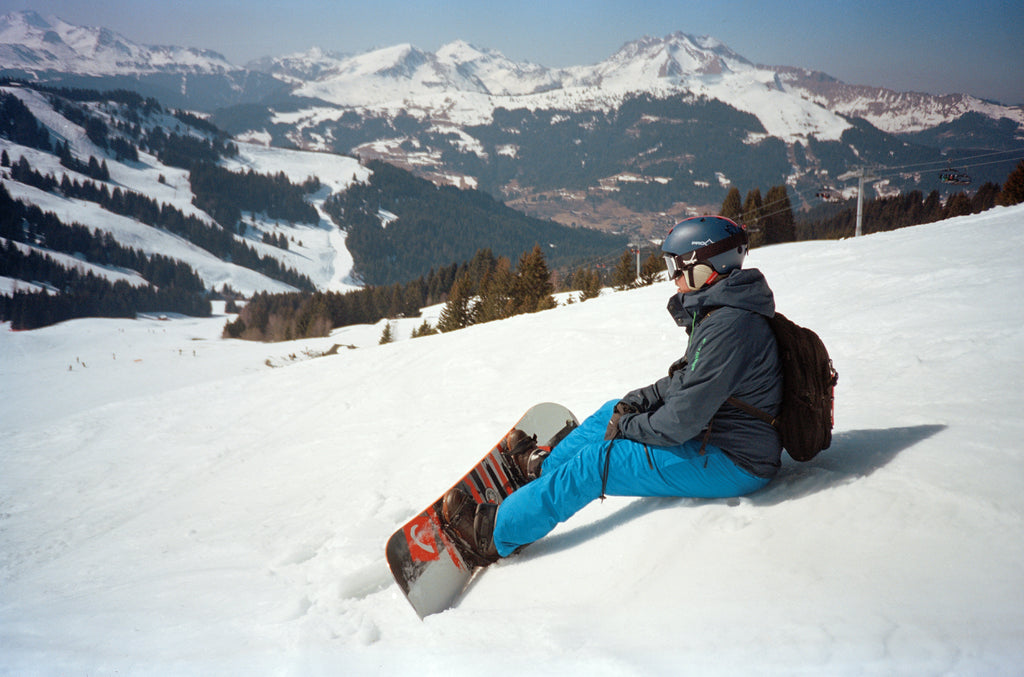
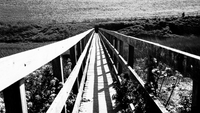
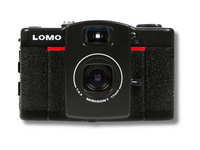
The sunlight at the top of a mountain is particularly bright - so I used Ektar 100 on my Lomography LC-A to capture this moment of rest
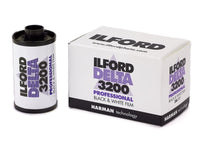
On the flip side, a higher ISO, such as ISO 800 or even higher like Ilford Delta 3200, is much more sensitive to light. It's the go-to choice for low-light conditions, like indoor settings or during the twilight hours. But remember, with increased sensitivity comes greater grain. While this grain can add a certain character and mood to your images, it can also reduce clarity.
Selecting the right ISO is not just about the light available; it's about understanding the look and feel you want to achieve in your photographs. A grainy, high ISO film can add a vintage, nostalgic feel to your shots, while a low ISO film can produce crisp, modern images. Experimenting with different ISO films is part of the fun and creativity of film photography.
So, how do you decide which ISO to use? It's a balance between the available light, the grain you're willing to accept in your images, and the artistic effect you're aiming for. Start with the lighting conditions and then consider the mood and texture you want to convey in your photograph. With practice, knowing the right range of film ISO for different seasons and lighting situations will become second nature.
Next, we'll explore the role of aperture size in capturing stunning images, adding the next layer to our understanding of the exposure triangle!
2. The Role of Aperture in Capturing Images
Aperture is a term that might sound complex, but it's an incredibly powerful tool in the photographer's kit. At its core, the aperture is the opening in your camera lens through which light passes. It's like the pupil of an eye, dilating or contracting to control the amount of light that hits the film. But aperture is much more than just a gatekeeper of light; it's a creative control that can dramatically alter the look of your photographs.
The aperture is measured in f-stops, such as f/2.8, f/8, or f/16.
Please note: a lower f-stop number means a wider aperture, allowing more light to enter the camera. This is a common thing to trip up the humble film photographer - it's down to the historical need to simplify comparisons between different lens systems for manufacturers and I'll cover it in more detail in the next section. Simply put: it's actually a fraction so f/22 is like 1/22 which is smaller than f/4 like 1/4. For now just remember low f-stop is a bigger aperture and we continue!
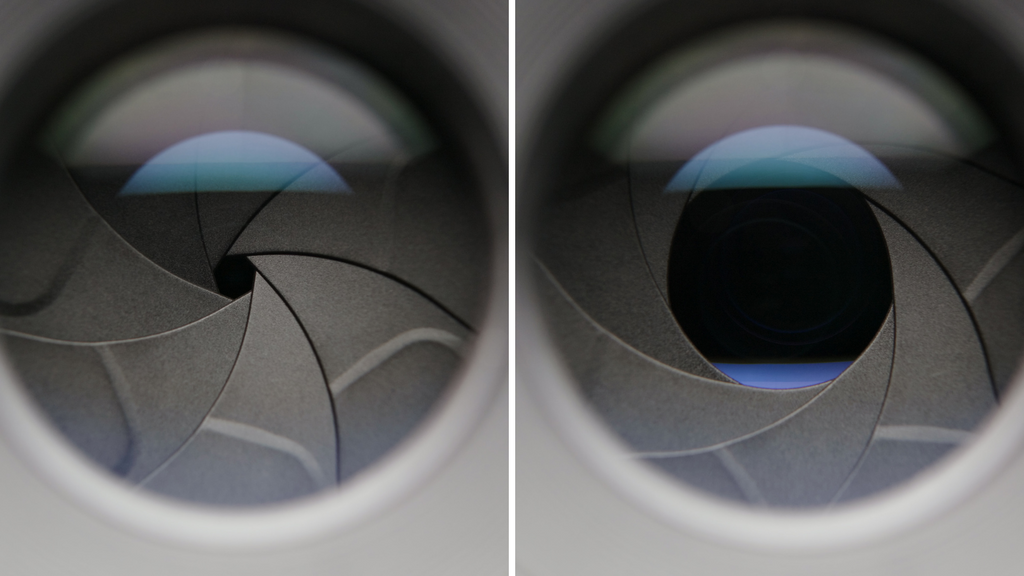
A large f-stop (f/22) and small aperture on the left; a small f-stop (f/5.6) and large aperture on the right
Low f-stops are therefore ideal for low-light situations. Conversely, a higher f-stop number indicates a narrower aperture, which is perfect for very bright conditions.
One of the most significant impacts of aperture is on the depth of field. Depth of field refers to how much of your image is in focus. A wide aperture (lower f-stop number) will produce a shallow depth of field, where the subject is in sharp focus, but the background is blurred. This effect is perfect for portraits or highlighting a specific part of a scene. On the other hand, a narrow aperture (higher f-stop number) results in a deeper depth of field, keeping more of the scene in focus, which is ideal for landscape photography.
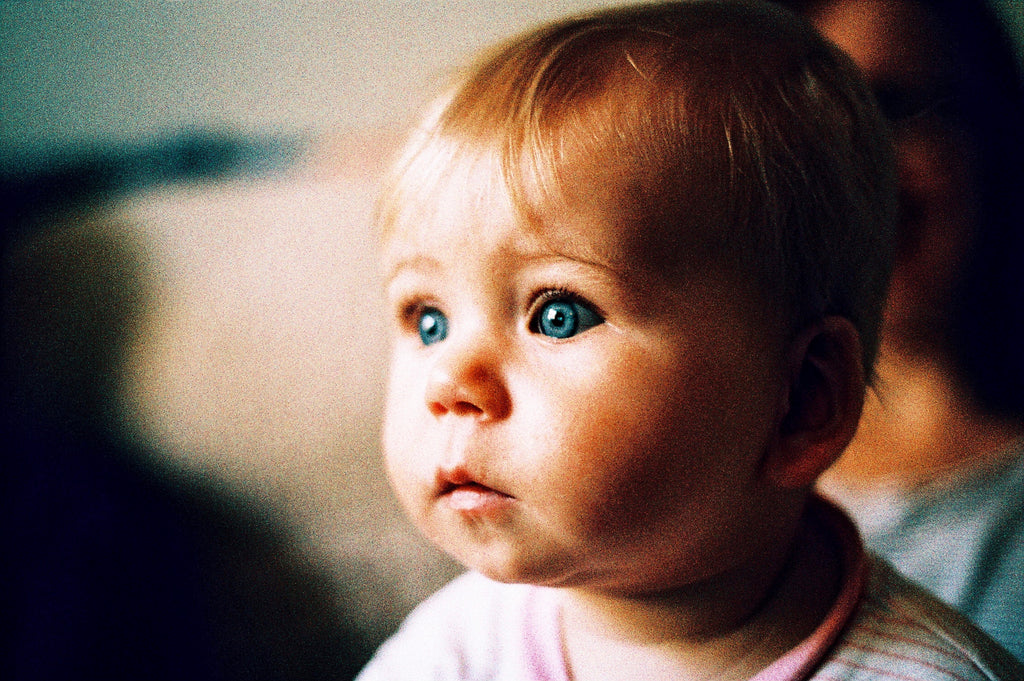
Using a large aperture (f/2.8) allowed me to capture my niece's left eye in perfect focus while the rest of the scene fades nicely into blur! Shot on my Olympus OM1 vintage film camera
Aperture also plays a crucial role in the overall exposure of your image. By controlling the amount of light that reaches the film, along with the ISO and shutter speed, you can achieve the perfect exposure for your shot. It's a balancing act that requires understanding how each element of the exposure triangle interacts with the others.
Experimenting with different aperture settings can be incredibly rewarding. It allows you to play with light and focus, giving you the power to direct the viewer's attention exactly where you want it in your image. Whether it's capturing the intricate details of a flower or the grandeur of a sweeping landscape, aperture is a key tool in realising your creative vision.
In the next main section, we'll delve into the world of shutter speed and its impact on photography, completing our exploration of the exposure triangle.
Quick Digression: The Maths of F-Stops
The term "f-stop" used in aperture measurement originates from the fraction that describes the ratio of the lens's focal length to the diameter of the entrance pupil (aperture). Essentially an f-stop is 'fraction stop' - a mathematical expression of the aperture size.
Here's how it works:
- The "f" in f-stop stands for the focal length of the lens.
- The number following the "f" (e.g., f/2, f/4, f/8) represents the diameter of the aperture in terms of how many times it fits into the lens's focal length.
For instance, an f/2 setting means the aperture diameter is one-half the focal length of the lens. If the lens has a focal length of 100mm, an f/2 setting would result in an aperture diameter of 50mm. As the f-stop increases (like f/4, f/8, f/16), the aperture size decreases. The scale is geometric, meaning each "stop" in the sequence allows in half as much light as the previous one.
This system was developed to standardise the control of light in photography, enabling photographers to easily compare and adjust settings between different lenses and cameras. It provides a straightforward and consistent method to understand how much light is being permitted through the lens, irrespective of the equipment used.
3. Shutter Speed and its Impact on your Photography
Shutter speed is a crucial component in the exposure triangle that significantly influences the outcome of your photographs. It's the duration for which the shutter of your camera remains open to expose the film to light. Shutter speed is measured in seconds or fractions of a second, like 1/500 or 1/30.
A faster shutter speed, such as 1/500, means the shutter is open for a very brief period. This is excellent for freezing motion, capturing fast-moving subjects like sports or wildlife without blur. A faster shutter speed also requires more light to expose the film properly, making it ideal for bright conditions.
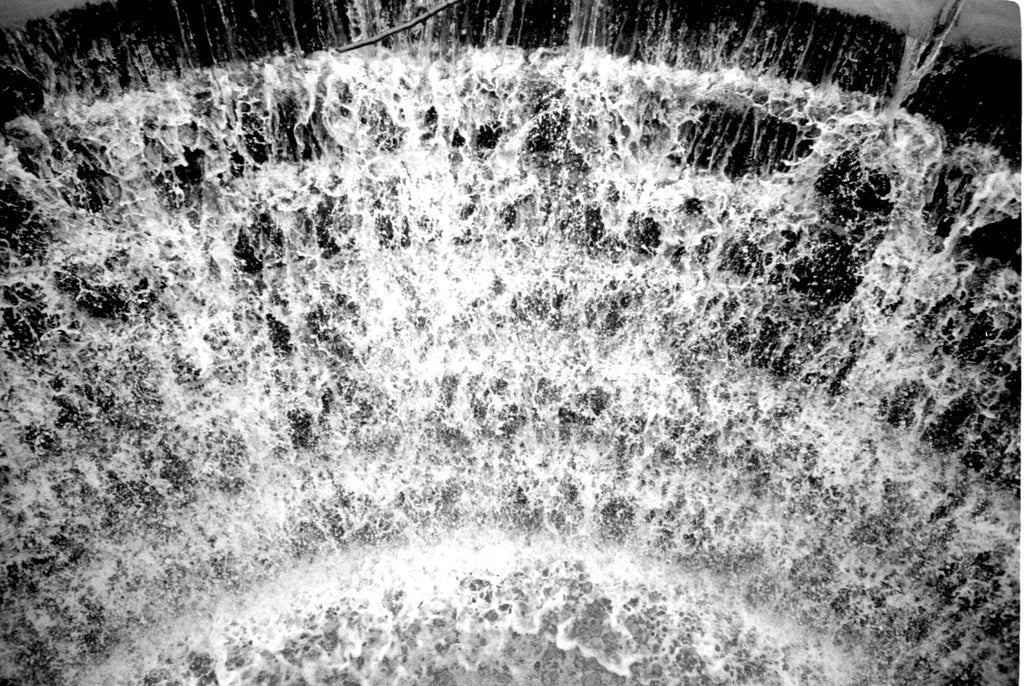
To capture the waterfall frozen in mid-air I needed a fast shutter speed, which meant I had to open up the aperture to compensate
Conversely a slower shutter speed, like 1/30, allows the shutter to stay open longer, letting in more light. This is useful in low-light conditions but can result in motion blur if the camera or subject moves. It's perfect for creating artistic effects, such as the smooth flowing water in a waterfall or light trails at night.
Shutter speed also interacts with aperture and ISO to achieve the correct exposure. A slower shutter speed can compensate for a small aperture, allowing enough light to expose the film correctly. Similarly, a fast shutter speed might require a wider aperture or higher ISO to ensure the film receives sufficient light.
Understanding and experimenting with shutter speed opens up a world of creative possibilities. It allows photographers to play with motion, light, and time, creating dynamic, compelling images. Whether it's capturing the split-second action or the graceful flow of a river, mastering shutter speed is key to expressing your photographic vision.
Shutter speed settings have evolved over the years, reflecting advancements in camera technology across different eras of film photography. So your available shutter settings may depend on your film camera's era.
In the earliest days of photography, film cameras often lacked a mechanical shutter. Photographers would manually remove and replace the lens cap to control exposure. As technology advanced, simple mechanical shutters were introduced. These early shutters typically had very limited speed options, often just a few settings like 1/25, 1/50, and 1/100 of a second
The mid-20th century saw significant advancements in shutter technology. Cameras started featuring more versatile shutter speed ranges, generally from 1 second to 1/500 or 1/1000 of a second. This period also saw the introduction of the focal-plane shutter in SLR cameras, allowing for faster shutter speeds and more precise control.
Modern 'simple' film cameras often have a fixed shutter speed (typically 1/60th or 1/80th second) - but this still allows for a fantastic amount of creativity.
Next, we'll explore how the sensitivity to light, depth of field, and motion blur all come together in the exposure triangle, creating a harmonious balance essential for capturing stunning photographs.
The Interplay of ISO, Aperture, and Shutter Speed
The true art of film photography lies in the delicate balance of the exposure triangle: ISO, aperture, and shutter speed to get a 'well exposed' image. Each element influences the others, and understanding their interplay is key to mastering photographic exposure and composition.
ISO's sensitivity to light is a foundational aspect that determines how much light is needed for a proper exposure. And as we said earlier - it's often very difficult to switch films mid-roll. A higher ISO can compensate for lower light conditions but at the cost of increased grain. This interacts with both the aperture (the amount of light allowed through the lens) and the shutter speed (the duration that light hits the film). Incidentally if you decide to shoot a roll of film with less light than is recommended and recover the image through developing that is called pushing the film. It's something that we're very comfortable doing in our photo developing lab if you need.
Aperture, with its control over the depth of field, affects how much of your scene is in focus. A wide aperture (low f-stop number) creates a shallow depth of field, ideal for portraits where the subject stands out against a blurred background. In contrast, a small aperture (high f-stop number) keeps more of the scene in focus, perfect for landscapes.
Shutter speed, determining motion blur, brings another dimension to the table. Fast shutter speeds freeze motion, capturing sharp images of fast-moving subjects, while slow speeds create a sense of motion, useful for artistic effects like light trails or flowing water.

Long shutter speed... so we know it was either a low ISO film, a small aperture, or a dark evening! And I remember it was shot on Lomography Earl Grey 100 at f/11 and a winter's day - so a bit of all three!
The beauty of the exposure triangle is in its flexibility and creative potential. By adjusting one element, you can compensate with the others to maintain the desired exposure, all while creating different aesthetic effects. For instance, in a low light situation, you could increase the ISO to allow for a faster shutter speed (when you change rolls!) or you could open the aperture to let in more light, depending on whether you want to avoid motion blur or maintain a certain depth of field. You can also play with taking double exposures on your film - doubling the light that hits each frame to create a 'blended' photograph!
Mastering the exposure triangle allows photographers to not only capture well-exposed images but also to express their artistic vision through their choices in ISO, aperture, and shutter speed. It's this interplay that makes film photography a continuously fascinating and rewarding pursuit.
There we go! Now before we wrap up I want to spend a little time on the Sunny 16 rule - as it's a handy guideline to help film photographers determine the correct exposure in daylight without the need for a light meter. Significantly simplifying the exposure triangle!
The Sunny 16 Rule: A Classic Guide to Quick Exposure Maths
In the realm of film photography, certain principles stand the test of time, and the Sunny 16 Rule is one of them. This rule is a simple, yet effective way to gauge the correct exposure on a sunny day, and it's famous enough to be the inspiration for our favourite film photography podcast!
The rule states: On a sunny day, set your aperture to f/16 and your shutter speed to the reciprocal of your ISO setting. For instance, if you're using a film with an ISO of 100, your settings would be f/16 at 1/100th of a second. This combination balances the brightness of a sunny day to produce well-exposed photographs.

I shot this photo without needing to check my light meter by understanding Sunny 16. Set my aperture to f/16, and my shutter speed to 1/400 as I was shooting a 400 ISO film
But the Sunny 16 Rule isn't just for perfectly sunny conditions. It can be adapted for various lighting scenarios with slight adjustments to the aperture:
- Slightly Overcast: Use f/11 instead of f/16.
- Overcast: Adjust to f/8.
- Heavy Overcast or Sunset: Drop down to f/5.6.
- In shade or backlit: f/4 is often suitable.
This rule is especially handy for film photographers who use cameras without built-in light meters or prefer to shoot manually. It not only enhances understanding of exposure settings but also encourages the development of intuitive skills in judging light conditions.
| ISO Setting | Bright Sun (f/16) | Slightly Overcast (f/11) | Overcast (f/8) | Heavy Overcast or Sunset (f/5.6) | In Shade or Backlit (f/4) |
|---|---|---|---|---|---|
| ISO 100 | 1/100 sec | 1/100 sec | 1/100 sec | 1/100 sec | 1/100 sec |
| ISO 200 | 1/200 sec | 1/200 sec | 1/200 sec | 1/200 sec | 1/200 sec |
| ISO 400 | 1/400 sec | 1/400 sec | 1/400 sec | 1/400 sec | 1/400 sec |
| ISO 800 | 1/800 sec | 1/800 sec | 1/800 sec | 1/800 sec | 1/800 sec |
Remember, the Sunny 16 Rule is a starting point. Various factors like the time of day, altitude, and reflections can affect exposure. Experimentation and experience will be your best guides in mastering this classic photographic technique.
Conclusion: Harnessing the Exposure Triangle in Film Photography
As we've explored throughout this article, the exposure triangle of ISO, aperture, and shutter speed is the cornerstone of film photography. It's a delicate balance that every photographer must learn to navigate, blending technical knowledge with creative expression.
Understanding ISO and its impact on film speed and grain, mastering aperture's role in depth of field and light regulation, and utilising shutter speed to control exposure time and motion blur, are all vital skills in a film photographer's arsenal. The interplay of these elements allows for an incredible range of artistic possibilities, enabling photographers to bring their unique vision to life.
Remember, analogue photography is as much about experimentation as it is about precision. Don't be afraid to play with different settings, explore various combinations, and see what works best for your style. Each adjustment in the exposure triangle is an opportunity to tell a different story through your lens.
So, as you load your next roll of film, consider: How will you use the exposure triangle to capture the world as only you see it?
Ready to dive in?
Keep Reading
View all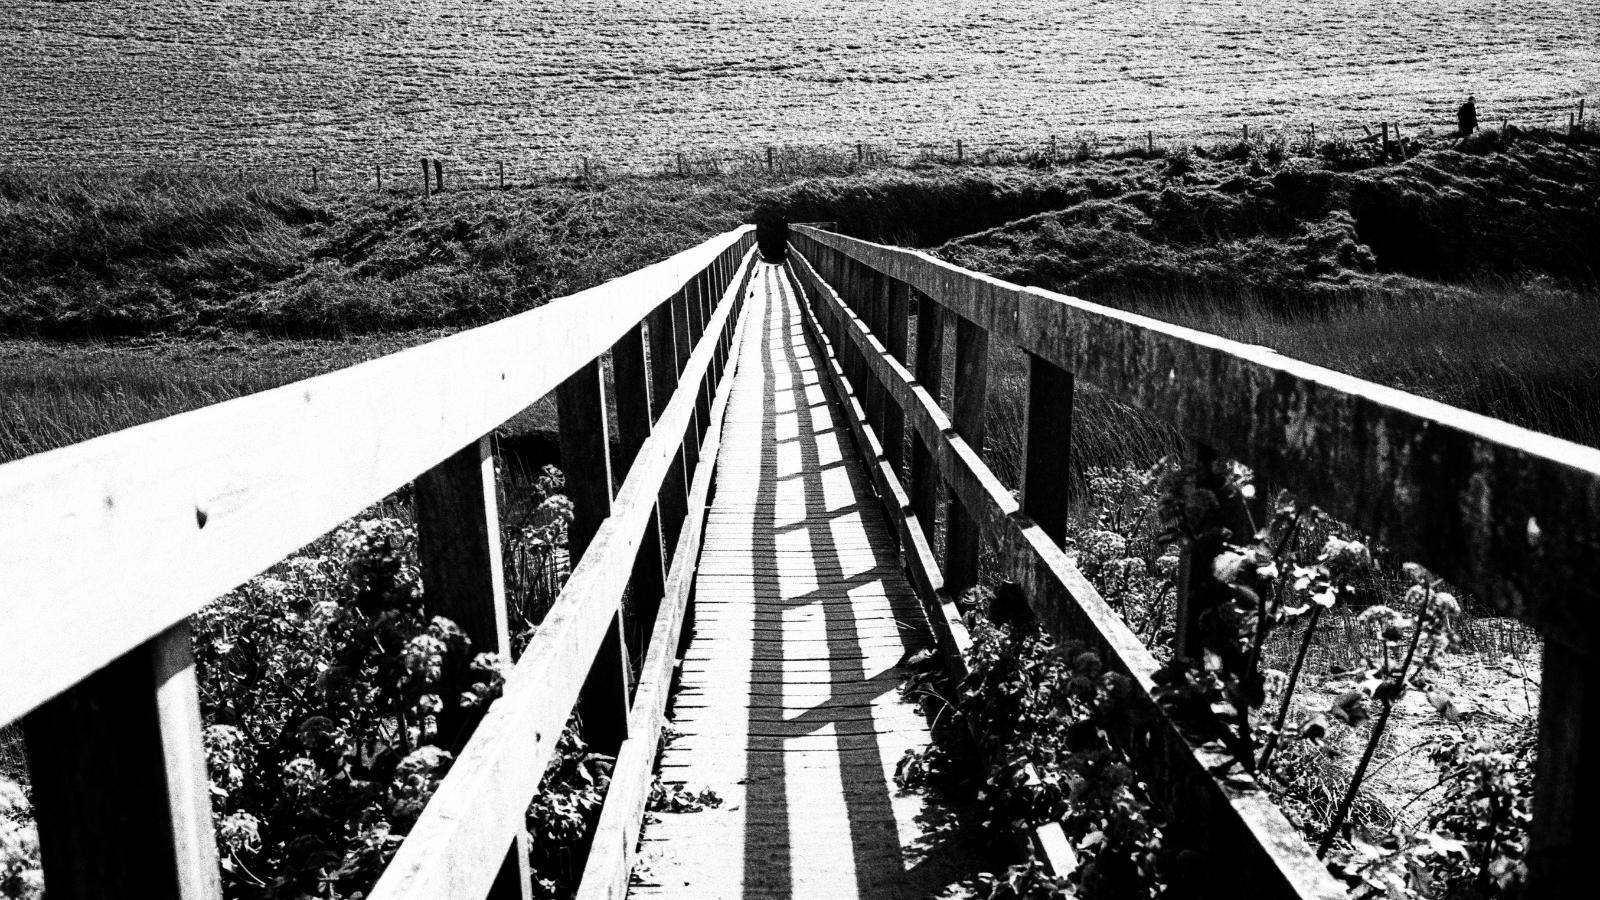
Experimenting with the Newest Addition: Ferrania P33 Film Review
Introducing our review of the latest addition to the black and white film lineup: Ferrania P33 35mm film! Hailing from Italy, this successor to Ferrania P30 boasts a 160 ISO, ensuring fine grain and crisp contrast. While ideal for landscapes, Amy and our Ambassadors tested its versatility across various subjects.
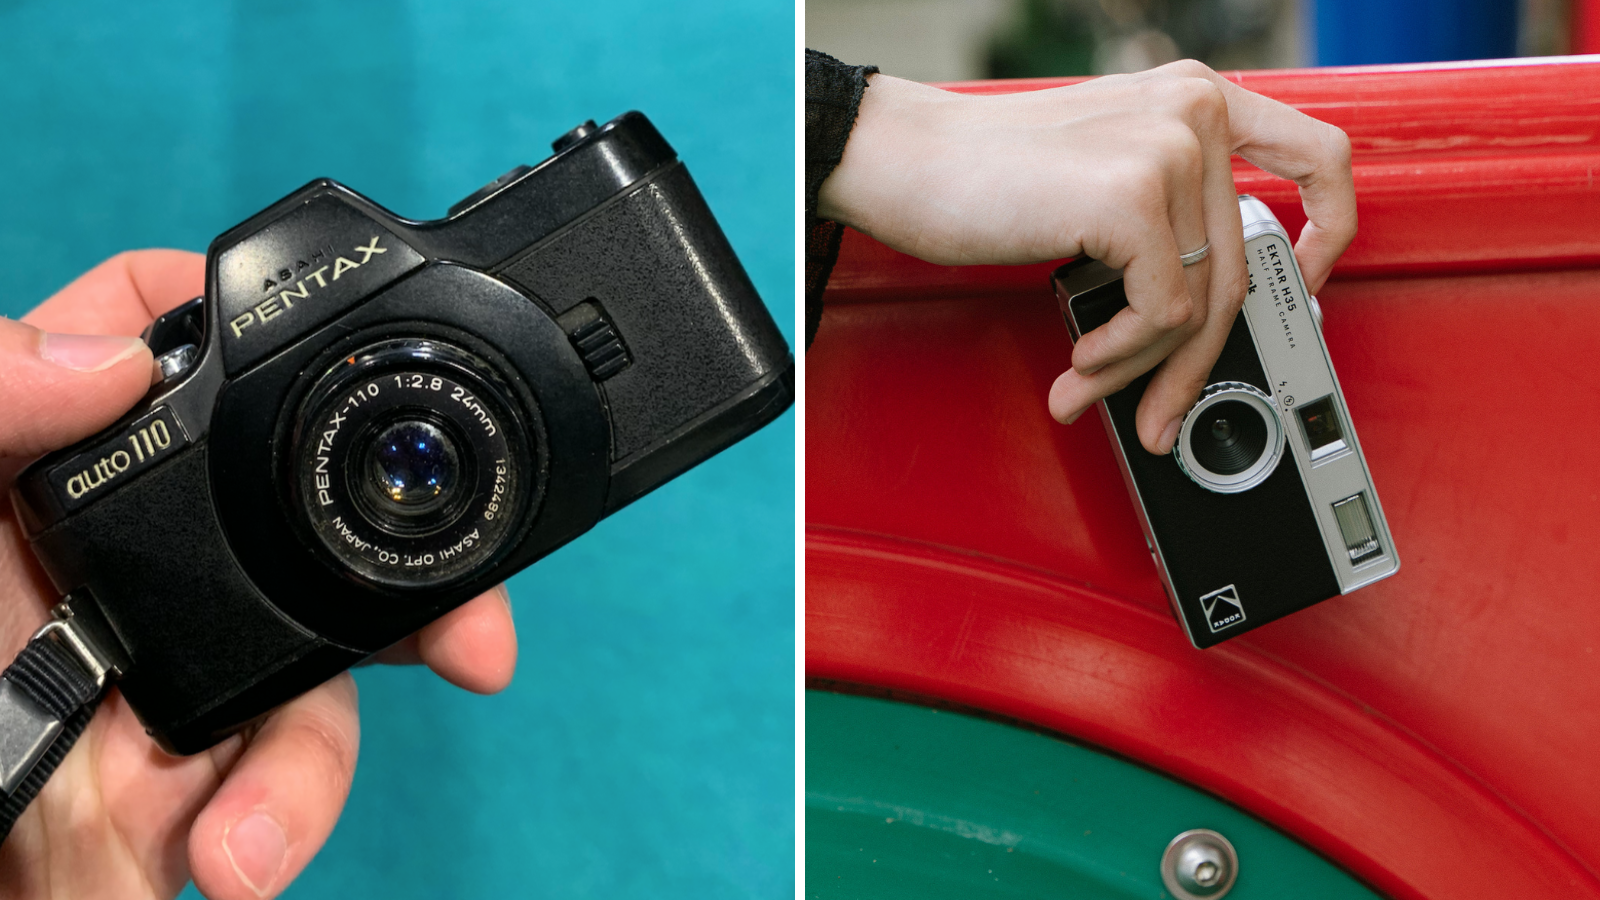
Half-Frame vs. 110 Film: Compact Convenience
Explore the unique qualities of half-frame and 110 film in our latest comparison guide. Learn which film format best suits your photography style, from the economical half-frame 35mm to the compact and easy-to-use 110 film. Discover the benefits and ideal uses of each to enhance your film photography experience.

- Opens in a new window.
1 Comment -
John Saunders •
Great explanation Paul. Between [this explanation of the exposure triangle](https://www.michael-elliott.photography/post/the-exposure-triangle-a-guide-for-film-photography-beginners) and yours I’m covered!