


Shop the article
Capturing the Ghosts: Techniques and Tips for Double Exposure Film Photography
Double exposure with film is one of the many ways you can get super-creative with your film photography adventures. In this article I will run through all the best tips and tricks so you can master double exposure with film photography in no time. I also talk to some talented film photographers who work with double exposures to get their advice on the process. Enjoy!
Personal experience
I have often tried taking double exposures with film (not always intentionally I have to confess) and I have found it a lot of fun - I enjoy the unpredictable results. Most of my double exposure film photos were either taken on my Holga camera or a Lomography Diana.
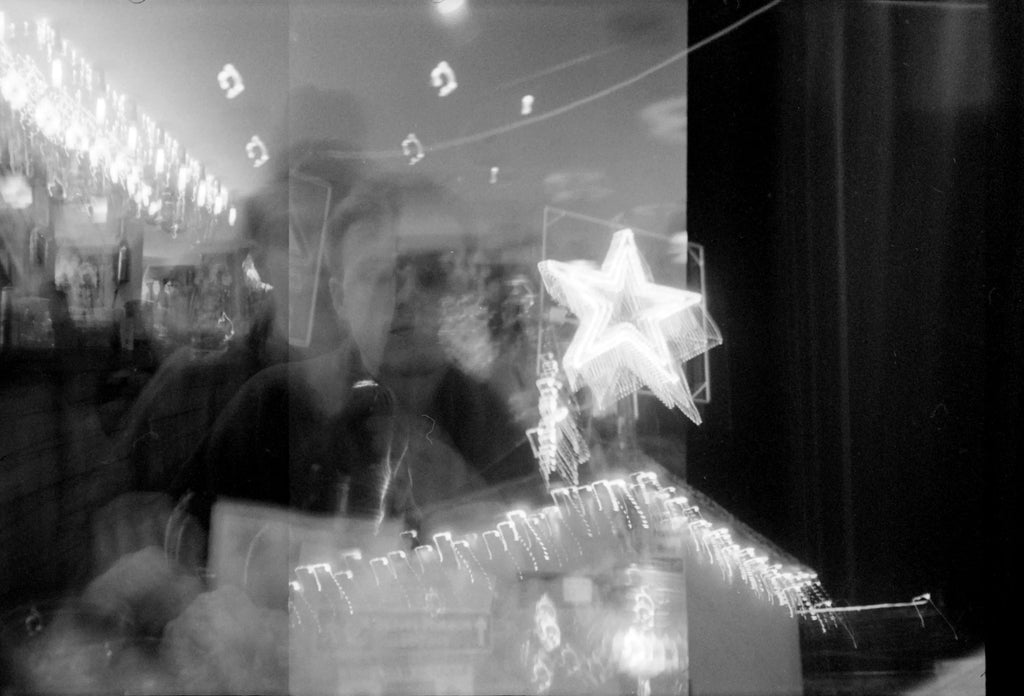
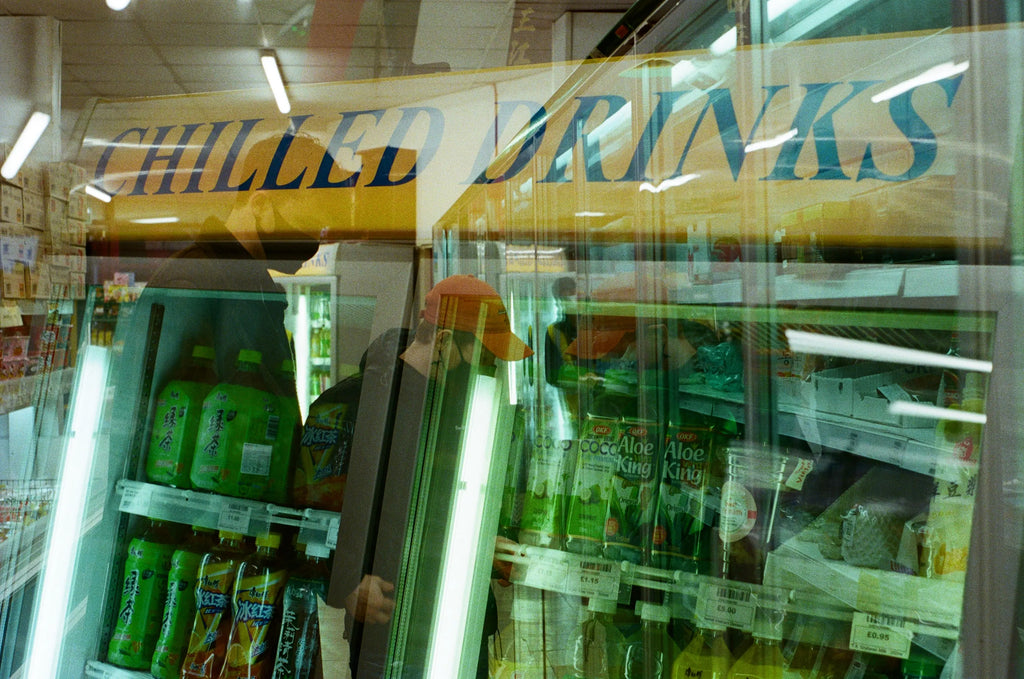
Happy Accidents 😅 (c) Emma Lloyd with a Holga and Ilford HP5 Plus 120 film
These cameras work well for multiple exposure because you don't need to wind on between frames, and with a Holga camera you can even wind on half a frame or less, which gives you this rather messy overlapping effect. But I love it! And I enjoy trying to figure out what each image is. I would love to learn how to make my double-exposed photographs more precise, so have done some research! Let's find out what I learned..
What is Double Exposure?
A double exposure is exactly what it sounds like: exposing the same frame of your film twice (or more if you’re brave enough for multiple exposures!). This can produce really cool images, layering up different scenes in one frame. You could take a random and experimental approach or think carefully about your composition to get some really clever visual interactions that fit perfectly together.
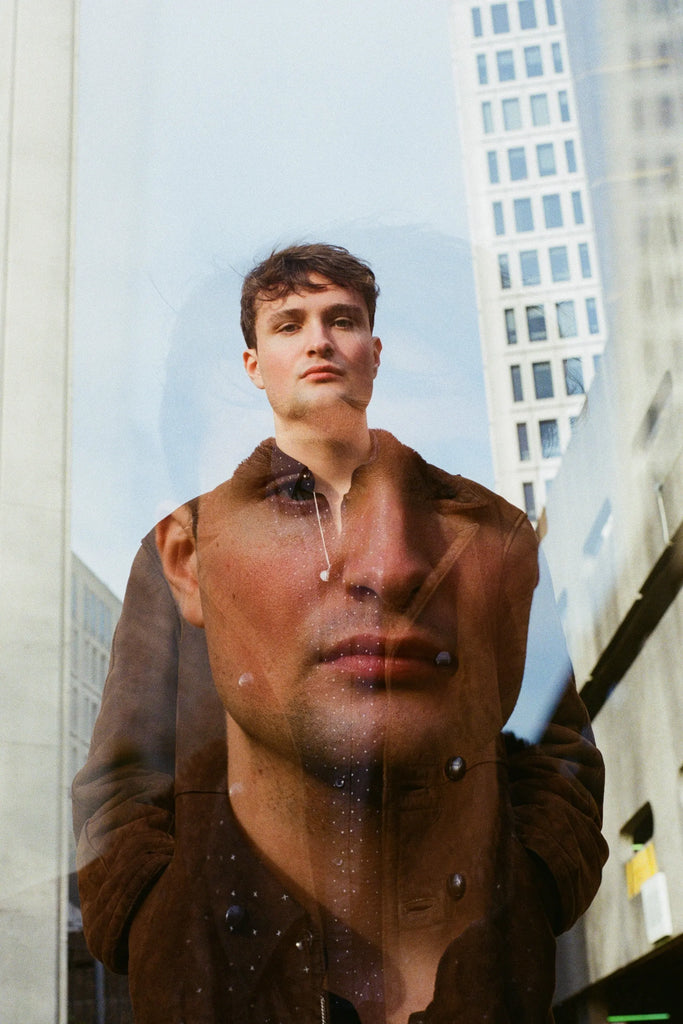
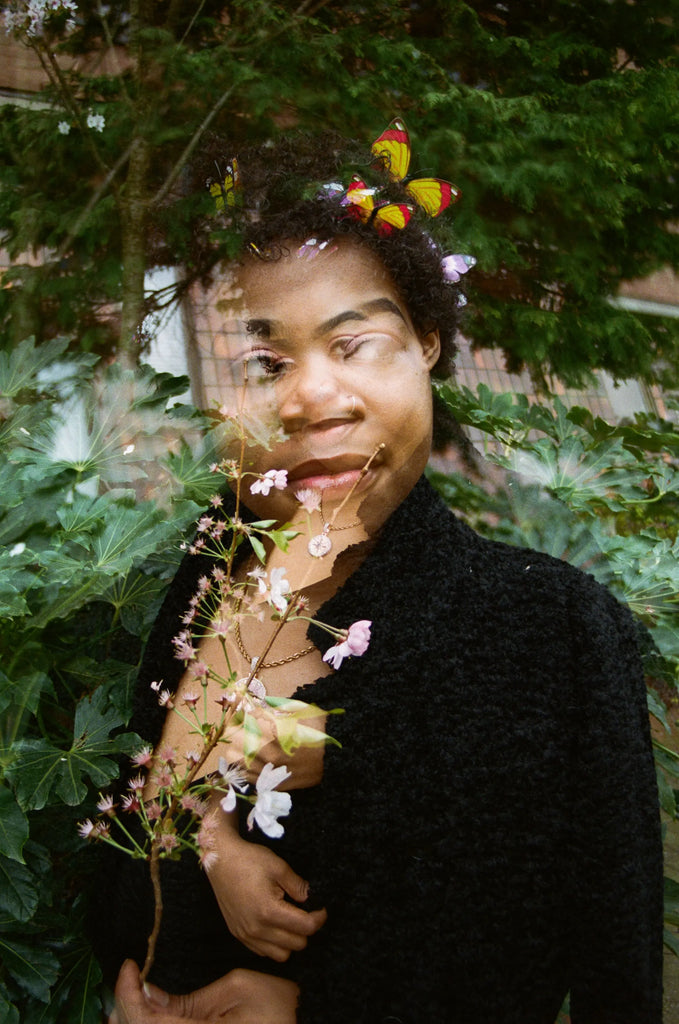
I love the 'double portrait' approach to multiple exposures. It captures more of a person's style in one frame than you'd think is possible! (c) flyflowfilm on Kodak Ultramax 35mm film
The technique requires a good understanding of light and composition, as well as how different film stocks react to overexposure. It's an exploration of the relationship between subjects, where the photographer plays with visual elements to tell a story or convey emotions in a unique way.
How does Double Exposure work?
Double exposure works by exposing your film to light twice. In order to get an image on both exposures you will need to underexpose, by cutting the exposure in half. This will mean that the double exposure shots equal out to a fully exposed image. If you are exposing the film more than twice, you will need to half this measurement again so that the exposure of all the frames equals out to a fully exposed photograph. Don't worry - we work through an example of the maths later in the article!
A fantastically atmospheric grainy photo by @ycontrolphoto - shot on their Mamiya 645 and Portra 400 120 film
And remember that films with a strong exposure latitude can still perform well when they are overexposed, so you will likely still get great results if you shoot each exposure normally.
What film should I use?
To achieve great results with double exposures, we recommend using colour or black and white negative film as they have good exposure latitude, which means they can over expose well. This gives us more room for error and makes metering much less of an obstacle.
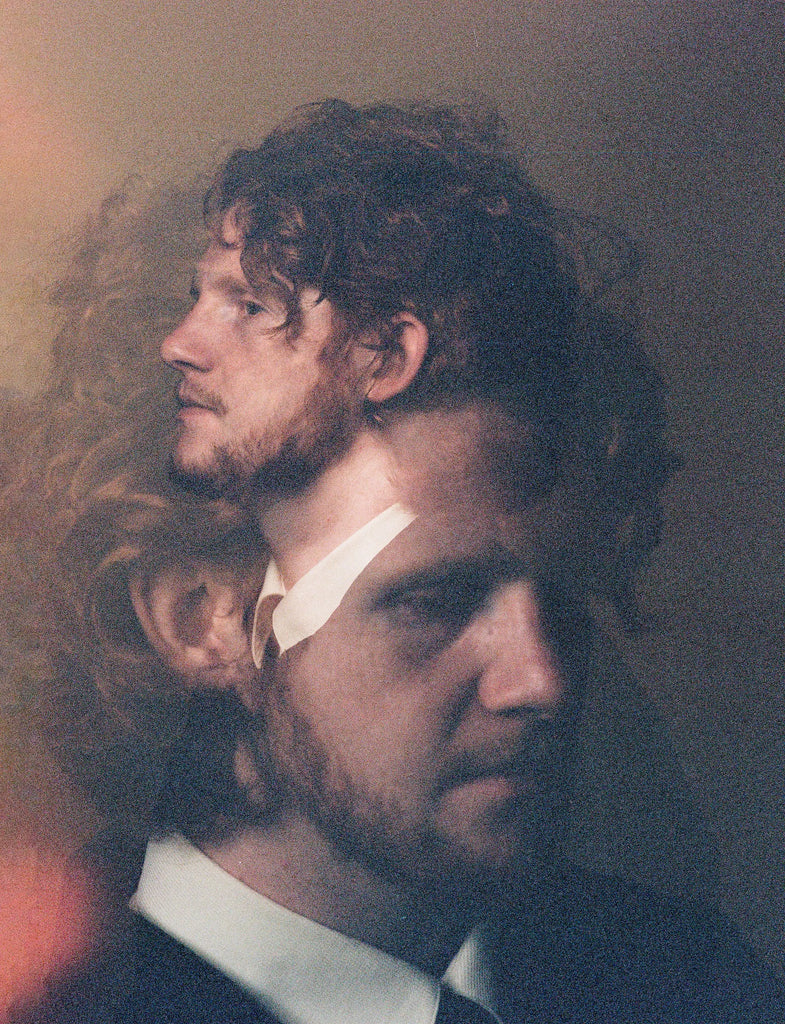
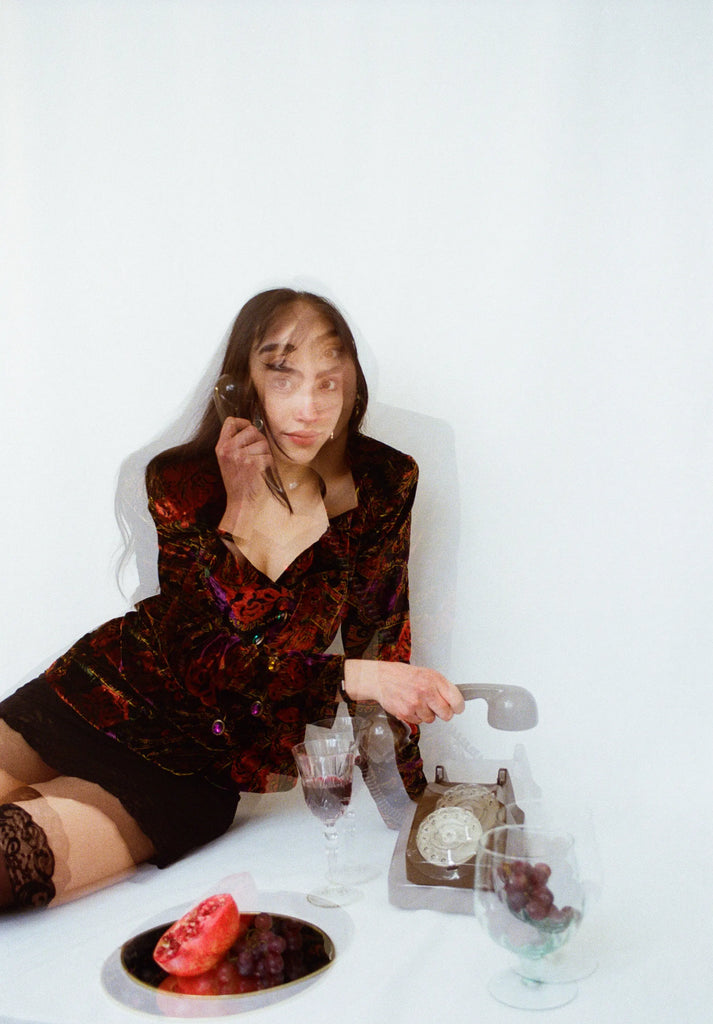
Another fantastic example of a double-depth portrait to bring the moment - and model - to life (c) @ycontrolphoto
Out of the two, black and white film is a great place to start with as the lack of colour simplifies the overlapping image, there is less detail and colour variation to get in the way and it will help you visualise how double exposure works. Black and white film also has the best exposure latitude. You can check out our article to choose from the Best Black and White Films!
It is possible to capture double exposure on E-6 slide film, but it can be tricky. You will need to concentrate on the metering far more because it has less exposure latitude and won’t perform well if it is overexposed.
What is exposure latitude?
Exposure latitude of a film refers to the range within which a film can accurately capture both the lightest and darkest areas of a scene without losing detail. In simpler terms, it's the wiggle room a photographer has when it comes to overexposing or underexposing a film and still achieving usable results. Films with a wide exposure latitude are more forgiving of exposure inaccuracies, making them ideal for challenging lighting conditions or for photographers who prefer to shoot without constantly metering for exposure.
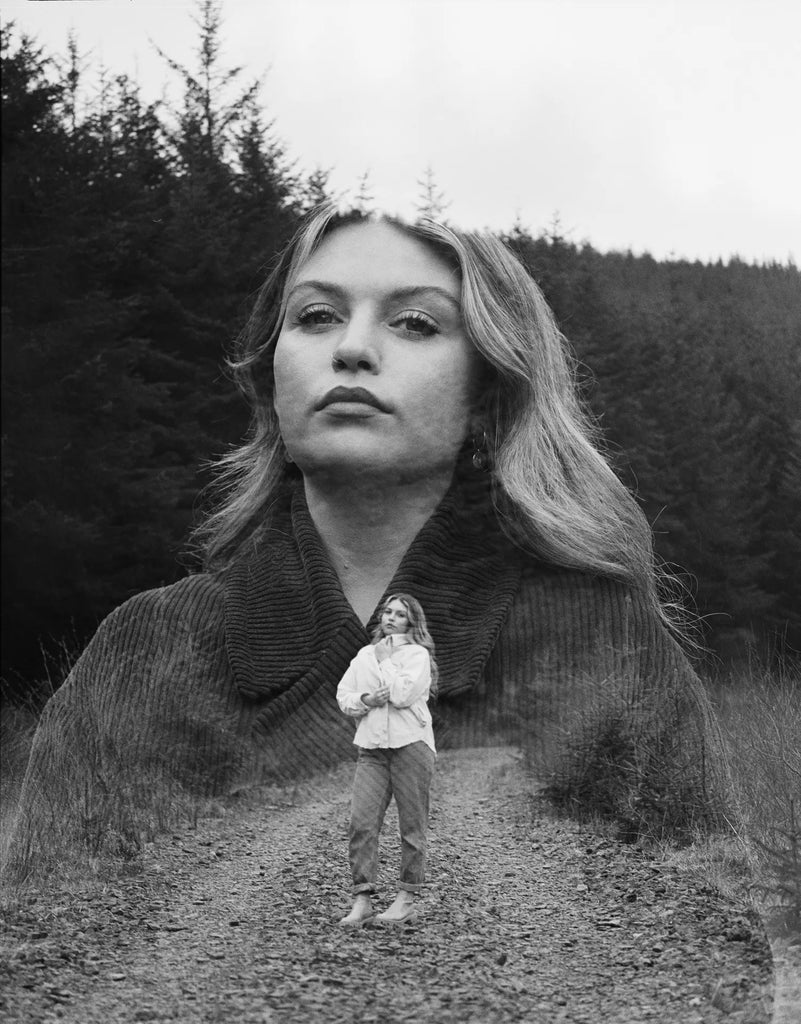
It takes a second for your brain to understand the photo, which makes it much more rewarding! (c) @flyflowfilm
The concept of exposure latitude is especially crucial in film photography, where unlike digital, one does not have the immediate feedback of a preview screen to judge exposure accuracy. A film with a wide latitude will gracefully handle scenes with high contrast, such as bright sunny landscapes with deep shadows, or indoor environments with mixed lighting conditions. This quality makes certain film stocks more versatile and user-friendly, particularly for beginners or those shooting in rapidly changing lighting conditions. Or, as we're talking about here, when experimenting with doubling the exposure on each frame!
What film camera should I use?
There are film cameras that will make double exposure photography a much easier process, but I am sure any film photographer will have a camera in their collection that can be persuaded into it. Some cameras have a multiple exposure button that allows you to take multiple frames before the film advances. Alternatively, cameras, like the Canon AE-1, Pentax K1000 or Nikon F2, can be tricked by pressing down the film rewind button on the bottom of the camera while simultaneously advancing the film.
If you don’t have access to this fancy tech, you can easily just shoot the same roll of film again by putting it back through your camera. You may not be able to get as precise shots this way, as you will have to remember what the original image you shot was, opposed to rewinding the frame and shooting it straight away, but it is a great place to start. Shoot the entire roll, reload it into your camera for the second pass and shoot over it again to create a double exposure.
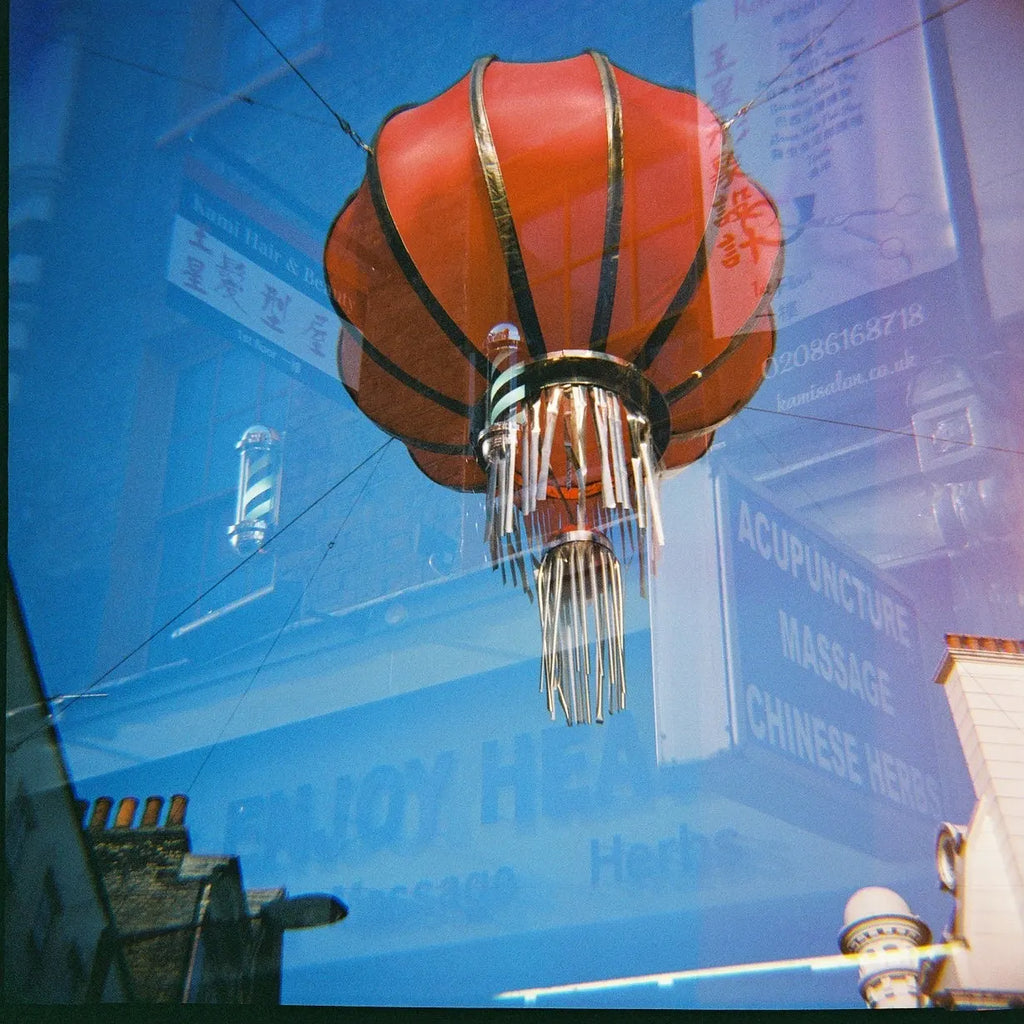
(c) Paul McKay - and a deliberate attempt to capture more of London's Chinatown scenery on a single frame - shot on a Lomography Diana 120 film camera
With this technique it is important to keep in mind that you need to align your second set of frames. You could use a marker to pinpoint the film’s position in the mouth of the cartridge. This way you will know that you shouldn’t pull the film beyond this point when you reload it for the second pass. Also, keep your first set of images in mind! You may want to make a note of the images you take as it is a lot to remember.
Check out this awesome reel below by @kateh00k demonstrating exactly how to mark your frames. Her double exposures are stunning!
Older manual cameras allow you to stay on the same frame between shots which makes it very simple to double expose. But the more modern cameras have a coupled film advance system and a shutter cocking lever, which prevents you from taking more than one shot on a single frame. In order to create beautiful double exposures we can cheat the cameras into doing so by rewinding the film back a frame.
Metering
Metering can be an intimidating subject and we can all become a bit reliant on TTL metering or even just sticking to our beloved point and shoot cameras, I am definitely guilty of this. But the best advice is to just go out and try it, once you see the results you will begin to understand how double exposure works.
Results of double exposure can be unpredictable even when you’re doing them deliberately, and double exposure in overlapping areas can result in an image being overexposed. If your goal is to create on correctly exposed image on the same frame in the same lighting conditions, you need to halve the exposure for a single correctly exposed frame. (If you're worried about the concepts, start with our Guide to the Exposure Triangle for Film Photographers)
Here are the two basic examples given in the Analogue Photography Book - Reference Manual for Shooting Film (a really great and beautifully produced book with all sorts of tips and tricks for film photography)
- Correct exposure at shutter speed 1/125 would need to be set to 1/250 for a double exposure (2 exposures, each 1 stop underexposed), and 1/500 for a quadruple exposure (4 exposures, each 2 stops underexposed)
- Correct exposure at aperture f8 would need to be changed to f11 for a double exposure (2 exposures, each 1 stop underexposed) and f16 for a quadruple exposure (4 exposures, each 2 stops underexposed).
The above assumes that you are shooting each with exposure in the same lighting conditions and want equal emphasis on both exposures in the resulting image.
A more subtle change of perspective than some other portraits - this gives a depth to the photo without drastically changing the viewpoint (c) @flyflowfilm
Top Tips for Double Exposure
Let's pull together our learnings into some key concepts:
- Anything that is white or bright will destroy information and anything black or dark will maintain information for the next exposure
- Choose your subject matter carefully
- Try to balance out the frames by pairing a busy image (with lots of detail) with a simpler one
- If you are after a specific outline or silhouette effect, place your subject against a blank background
- You could take the first shot of the sky, something with some nice texture or a neutral coloured wall
- Keep in mind how highlights and shadow details will work together when shooting two frames on top of each other: the shadows in your first frame will be filled in by your second, the highlights of your first frame will most likely be lost in your second
And then let's hear directly from some of the film community who are renowned for their double exposure photography - and whose photos have illustrated this article!
The double frame gives an idea of action and movement - telling a dynamic story (c) @flyflowfilm
Tips from @flyflowfilm
My top tip when first trying double exposures is to remember that the darker parts of the first image will be where the second exposure will ultimately be more visible, and lighter parts of the second exposure will superimpose the first exposure. Black and white film is a great way to start, as it makes this a lot easier to plan and conceptualise.
Another tip would be to have fun! There's always an element of surprise to the planned shots, but sometimes the best double exposures are the spontaneous ones. This is a great way to learn about how they work, as you can compare what you thought was going to happen to what the actual result was. This is usually my method to double exposed portrait shots; I'll either get the person to change their pose or move towards or away from them, and let the rest remain a mystery until i get my roll back!
Like film photography as a whole, not every double exposure will go to plan, but it all feels worth it when you get that perfect shot!

You can rotate your camera between shots to play with orientation and reality (c) @ycontrolphoto
Tips from @ycontrolphoto
Always best to shoot the two exposures in the one session so you can have a better idea of how the final image will look. I've seen other photographers reuse the whole roll and shoot whatever, but I'm too meticulous for that
Shooting against a plain backdrop always gives clearer results, and keep in mind the blacks are where your second image will be most visible.
A good tip is to go down an f stop when shooting the second exposure so you're not over exposing the overall image.
When shooting colour film, it's important to find complementing colours/textures that will flatter your subject. With b&w, look for bright highlights and deep shadows to add some drama to the image.
Double Exposures on Film: Conclusion
Mastering double exposure film photography opens up a universe of creativity, allowing photographers to craft images that weave together narratives, emotions, and unexpected beauty. Whether you're experimenting with film for the first time or looking to add new techniques to your photographic repertoire, the world of double exposures offers endless possibilities.
I hope that you've seen enough examples and ideas here to unlock your creativity! I would strongly encourage you to embrace the unpredictable nature of this art form, experiment with different subjects and settings, and don't get hung up on perfecting it from the start!
What double exposure creations do you have in mind?
Ready to dive in?
Keep Reading
View all
Analogue Appeal: Why Do People (Still) Shoot Film?
The internet is full of personal manifestos about why people shoot film but at Analogue Wonderland we are uniquely placed to take a wider view of the question. So I have canvassed our community to pull out the key trends, themes and topics to provide a comprehensive overview: why do we shoot film?

Digital Notes for Analogue Photographers
Many analogue photographers don’t bother taking notes on the images we take. But there is so much valuable information either locked up in our heads or, more likely, lost to time that we could be leveraging to improve our skills and our images. Find out how Crown + Flint could help improve your photography!

- Opens in a new window.
7 Comments -
Angello T • -
Smita Rane • -
Chrissy Mac Dougall • -
Jess • -
Caitlyn •
1 2 →
Hi, is there some time limit between each exposure? I’m pretty new in this and haven’t experienced a lot with double exposure
Great post! Really enjoyed reading your insights.
Can anyone help or explain something for me?
I am devastated after having a portrait party with 40+ friends.
I’ve done loads of amateurish (but often great results) double exposure photography using my Lomo Cosmic Symbol. I usually rewind the whole film to do the second lot – I love the surprise element.
I used black-and-white for the first time the “Lomography Black & White Lady Grey 35mm 400 films”. I usually do colour. Films were in date. First takes were done in natural (but good) light -indoors – portraits all with white background and the same position – used a tripod for the first time too. Second take was done at a botanic gardens -all luscious spring sproutings – gorgeous textures and plenty with white backgrounds too.
Anyway, I am baffled and bereft as NOT A SINGLE ONE of the 108 pics has any sign of a portrait. Just the botany from the second take. Negatives have nothing either, Developed by a proper highly-respected outfit here in Edinburgh. Can anyone enlighten me as to what has happened? Absolutely gutted…thank you!
It would be nice if they wrote the settings on these photos so we can get an idea.
Love this article, huge help 🤍