Making a Pinhole Film Camera - from Analogue Wonderland Packaging
By Paul McKay
On last night's Analogue Television show with Rachel Brewster-Wright we discussed how simple it is for people to make their own pinhole film camera from items in their home.
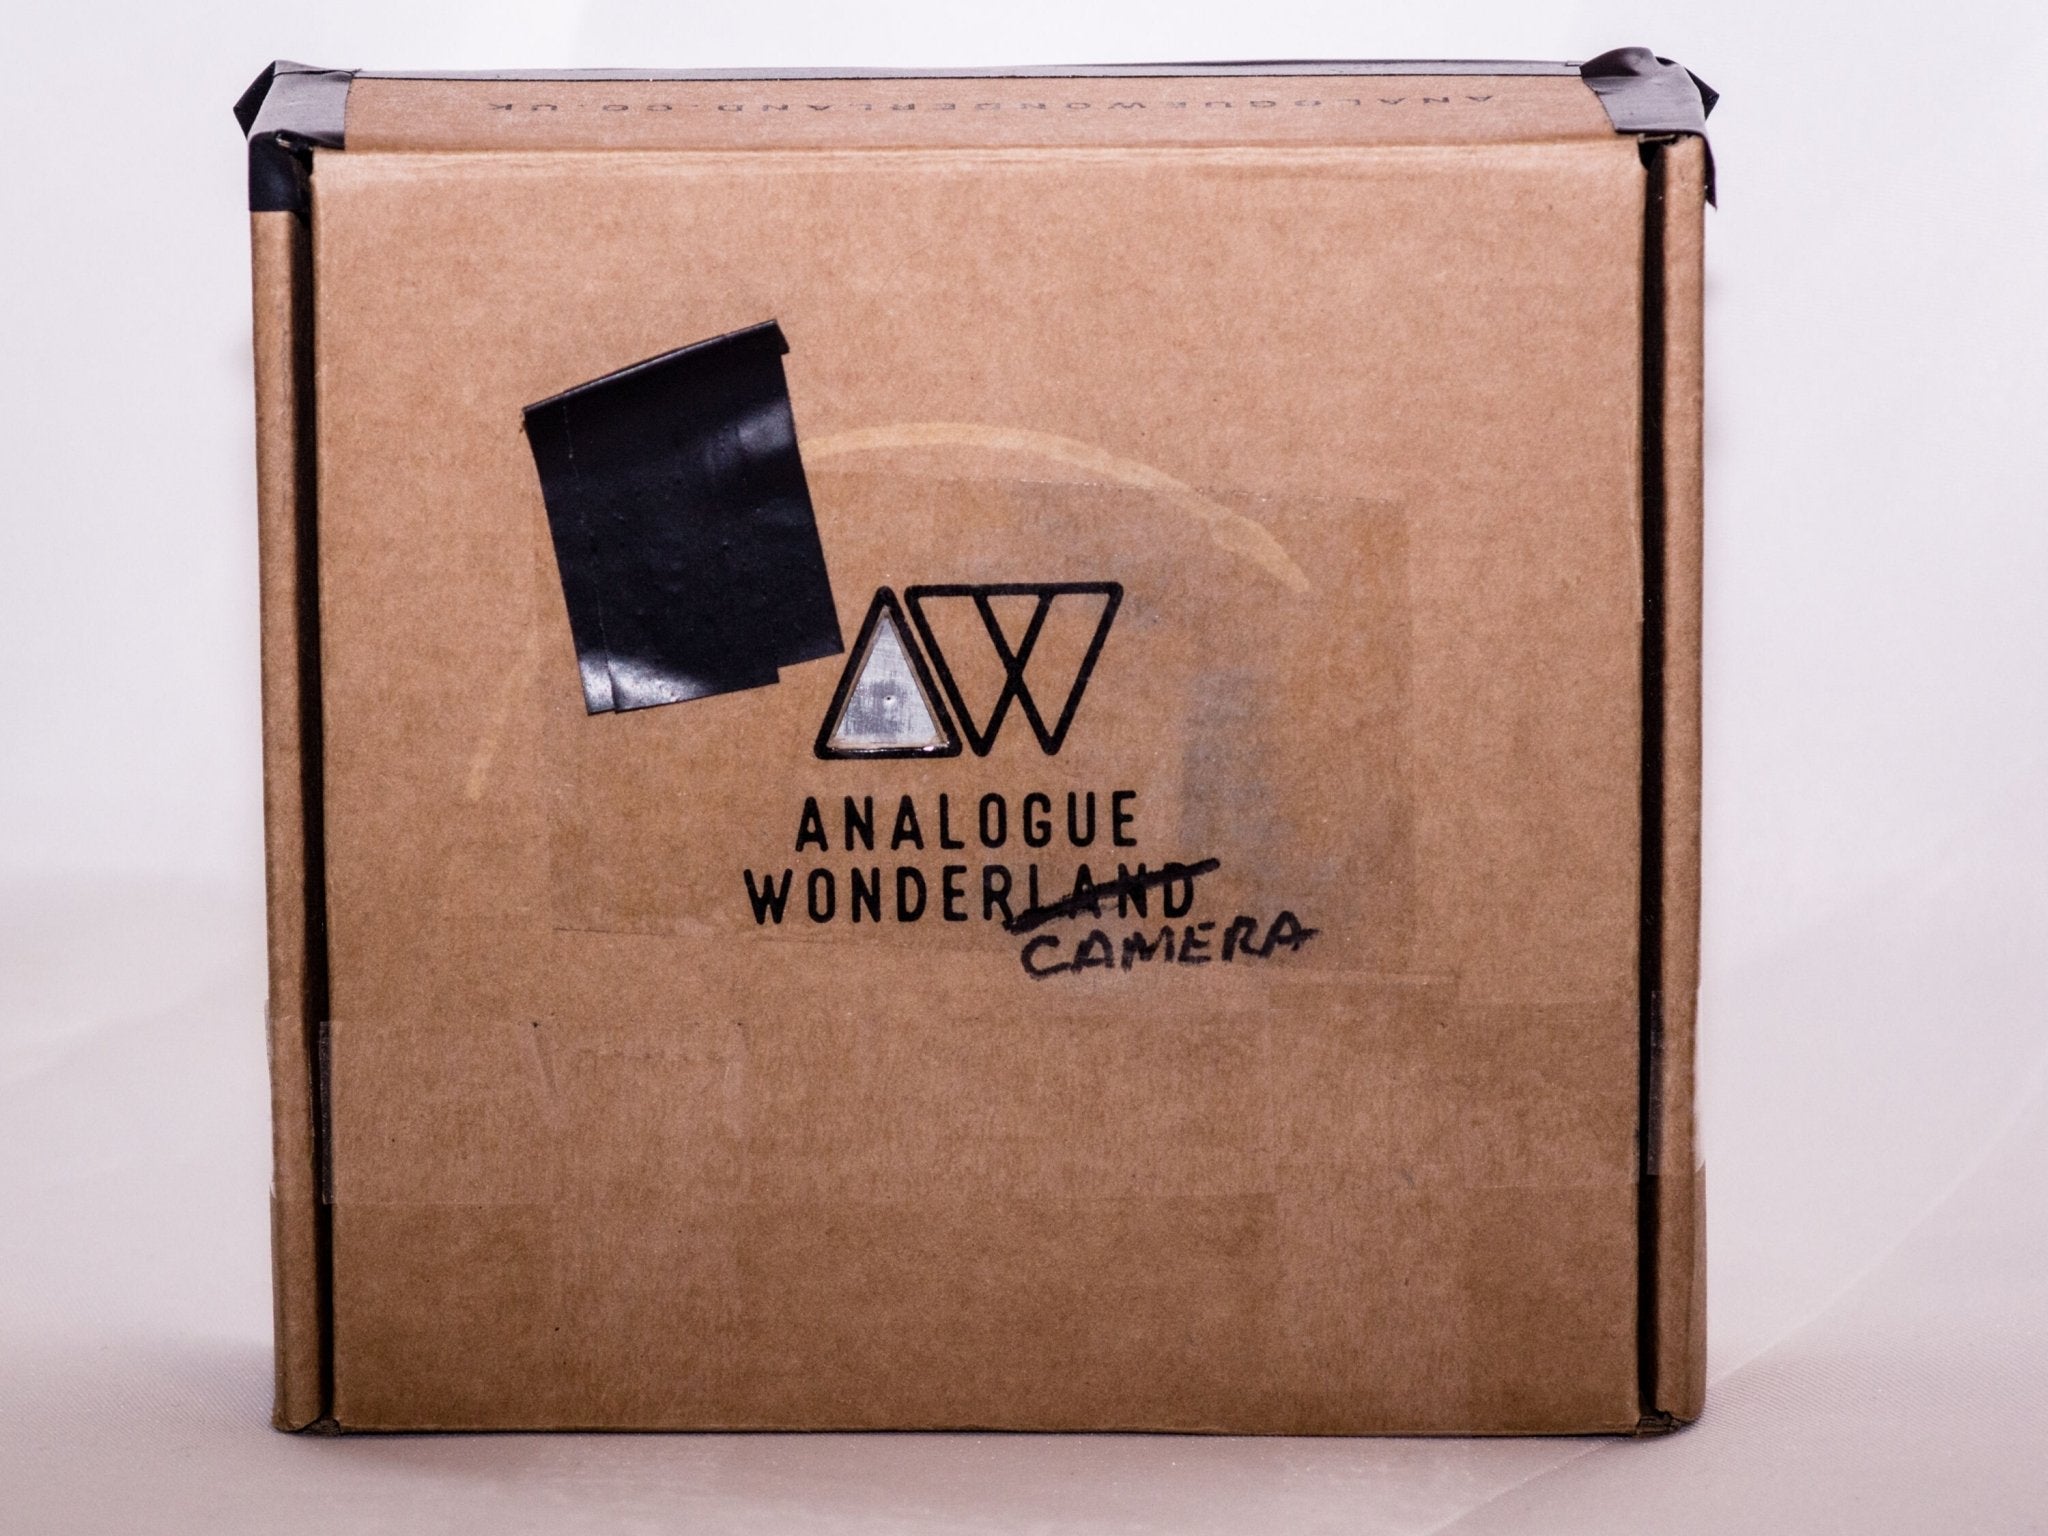
And to prove the concept Dale Willetts has just shared with us a camera he made out of Analogue Wonderland's packaging! He's kindly written up the entire process so it can be duplicated - what a wonderful bank holiday project :-) Note that the box he used is our old packaging currently being phased out, but the premise shows that you'll be able to use anything similar.
Making a Pinhole Camera
So, it's nearly the end of April 2020, the Corona virus lock down is in full swing here in the UK. You've already been out for your one hour's allowable exercise.... and you're BORED!
This was me, and my predicament. I was sitting in front of the PC considering my options for alleviating the boredom when it happens. I spot a small cardboard box I'd received some film in from Analogue Wonderland that I hadn't yet got around to recycling.
That's when the light bulb moment happened. "I wonder if I could make that into a camera?"
Now I enjoy all forms of photography, but i do love pinhole photography and I enjoy making pinhole cameras. But making a camera out of a piece of packaging that's basically brown card and full of fairly obvious holes where its folded together....... “Nah! That's a stupid idea” says the sensible internal voice. “Cool, let's do it” says the up for a challenge internal voice, (did I mention the lock down ?..... and boredom?)
Do you see a box...or a camera?
What Do I Need?
The materials list :-
- The small mailing box
- A roll of electrical tape
- A few off cuts of foam core board
- A roll of sellotape/parcel tape
- A small piece of aluminium drinks can
The tools list :-
- A ruler
- Scissors
- A sharp knife
- A pen or pencil
- A pin
- Fine sand paper or wire wool
I love it when a plan comes together
Preparing the Box
The initial construction was simply a matter of using the black electrical tape to tape over all of the edges of the box where there are slots and tabs used to hold the box together. And the slots created at the back where the sides of the box are folded. Basically anywhere it look like light may get in.
I then realised that when the lid folds down and is secured with it's tabs the four corners wouldn't be light tight. This is where the foam core board off cuts from previous camera builds came in. Three pieces cut to fit inside the box along the front and sides, leaving a small gap between the side pieces and the side of the box for the lids tabs. The foam core is roughly 5mm thick so once the three pieces are taped into place they form a light tight baffle around the edge of the lid and also hold the paper negative in place as it can be slid into the box under the foam core.
The next decision was where to put the pinhole. Normally this would be smack bang in the middle. But I wanted to keep the logo intact.
Light bulb moment two, cut out the triangle that represents the “A” in the Analogue wonderland logo and put the pinhole there.... obvious really.
My standard shutter on pinhole cameras is a short length of electrical tape over the hole. However I didn't want the tape to possibly tear the box material which could cause light to leak in. Another easy fix, put a square of normal sellotape over the logo and cut out the triangle where the pinhole is. The shutter tape won't cause damage and will come off easily.
Creating the Pinhole
The pinhole itself I already had made, but again it's an easy job. Take a small square of drinks can. Gently poke a pin into it until it only just pierces through the aluminium. Use the sand paper or fine wire wool to sand down the raised bump created on the backside of the aluminium.
This makes a pinhole that is roughly 0.298mm in diameter which is the size of pinhole that most pinhole camera design calculators use as a base size. I use a phone app that's based on the camera design calculator on http://mrpinhole.com/
Measuring the depth of the box from roughly where the pinhole sits to where the paper will be is 45mm. Using this measurement and the 0.298mm of the pinhole in the design calculator gives an effective “F stop” of F151 for use when deciding how long your exposure will be.
The Finishing Touch
A little light rebranding on the front logo :-D
My lawyers will be in touch
The Litmus Test
So, job done camera made. Boredom alleviated....... BUT! Does it actually work?
So far at the time of writing this I have only made two photographs with this camera in my garden just to see if it would work. As you can see below, it does.
I used some old Kentmere paper which I rated at E.I. 3. This using the light meter app on my phone set at iso 3 and F151 on a fairly bright but cloudy day gave me eight minute exposure times.
The pictures came out well though the centre of the negative is slightly over exposed so if/when I use the camera again I will try using it at F100 to give a slightly faster shutter speed which should give a better exposure in the centre if slightly darker edges.
Success!!
Final Thoughts
So, job done camera made. Boredom alleviated, AND I have a working camera.
In case you are interested the total build time to make was roughly 30 minutes give or take. After posting about the camera on Instagram Paul kindly asked me to write this blog post.
Writing about the camera took at least three times as long as making it....So I'm still not bored again. Yet.
Dale Willetts
Ready to dive in?
Keep Reading
View all
The new series: Analogue Adventures
Submit your personal Analogue Adventure - and if chosen we will work together to turn your experience into an article on our site and social posts on our account for posting with the analogue community!

Analogue Adventures: Nic in India
The first in our new series of community articles, find out how film photographer Nic got on with a Pentax 17 camera in India!

Another award for our lab: Photography News 2025!
We're delighted to share the news that our film lab has won the Editor's Choice award from Photography News for 'Best Processing Lab'!
Subscribe to our newsletter 💌
Sign up for our newsletter to stay up to date on film photography news, sales and events:
Free Tracked Shipping
On all UK orders over £50
Passion For Film
An unbeatable range and an on-site lab
Our Customers Trust Us
Thousands of independent 5* reviews
All Deliveries are Carbon Neutral
Independently audited and verified by Planet
- Opens in a new window.


2 Comments -
Fleeta • -
Fleeta •
Nice pictures!
thanks
Any chance you can show us the inside of the camera? Curious to see how much of the box was used for exposure. Also, did you use positive paper or expose onto sheets of film and then print?
thanks!