Top Tips for Shooting HARMAN Phoenix
By Amy Farrer
So, you’ve heard all the amazing things about HARMAN Phoenix and are excited to place your order. Now, you're probably eager to discover how to enhance your experience with this innovative 35mm film - and you're in the perfect spot to get all the details! As an official testing partner for Phoenix 200, we've collaborated closely with the HARMAN team to dive into the nuances of this cutting-edge colour film. Crafted entirely from scratch at the HARMAN Technology factory in Mobberley, Cheshire, Phoenix promises a unique and captivating photographic journey. It is also now available in 120 format!
Allow us to guide you through how to unlock the full potential of HARMAN Phoenix 35mm film with some top tips from the experts themselves…
Tip 1: Shoot in consistent light
HARMAN Phoenix has an ISO 200 film speed, making it optimal for well-lit conditions. While it can be rated anywhere between ISO 100 and 400, its true potential shines in environments with abundant, consistent light. Steer clear of deep shadows and direct sunlight for the best results. That being said, experimenting with these extremes can yield intriguing effects, such as a charming halation glow which emerges when shooting into the light.

Despite its slower film speed, don't hesitate to explore Phoenix's versatility in low-light settings. We conducted our own experiments during the late afternoon, as natural daylight waned, and were pleasantly surprised by the film's ability to produce a stunning, painting-like effect with harsh shadows.

Image © Sundari Uthayakumar
Tip 2: Nail your exposure
The HARMAN team highlights the importance of precise metering to achieve optimal exposure, and emphasises the avoidance of over or underexposure - Phoenix doesn't respond well to extremes. To harness the full potential of this film, it is recommended to use a manual SLR film camera, offering greater control over exposure settings.
Ensure accurate metering for mid-tones to preserve intricate details in shadows and highlights. No need to worry though - we don’t expect you to nail it on the first try (it took us a few rolls to get there, too!) You can see some more exploration of different ISOs in our review of Phoenix 120. Remember that this is an experimental film and HARMAN’s primary goal is for you to enjoy the process and learn as you go.

Tip 3: Explore the halation
The fascination with halation has significantly grown in popularity over the years, gaining prominence through film brands that have brought it to the forefront such as in CineStill’s colour film and Washi F’s black and white film. Halation comes into play when light traverses a film emulsion and reflects back, creating a soft glow around bright areas of an image or halo like effect. Luckily, we’ve written a blog all about it so you can learn more about the beauty of halation here.

Tip 4: Look for colours
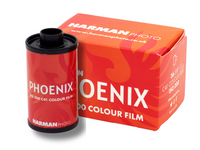
A standout feature of this film is its vibrant colour capture - one of its most impressive qualities. Whilst the creation of the formidable HARMAN Phoenix branding took place first, it was a pleasant coincidence that the subsequent film emulsion perfectly mirrored the vibrant colour characteristics presented in the bold packaging.

Optimal colour replication occurs with warm, vibrant colours, particularly in shades of oranges, reds, and browns. Additionally, exploring blues and greens will unveil intriguing colour representations, allowing you to appreciate the creative capabilities of HARMAN Phoenix in capturing a diverse spectrum of hues.
But be mindful that, unlike other colour film stocks, some colours may not perfectly replicate real-life hues. You might have some chance encounters with distinctive features like speckles and anomalies in the coating, adding a playful element to experimentation. So, go ahead and explore to see the unique results you can achieve!

Image © Karen Freer
Tip 5: Pair it with good glass
Experiments have shown that HARMAN Phoenix performs well with high-quality optics, where using a quality camera lens with good glass will make a big difference to the final image. Compact point-and-shoot cameras, with their lenses, tend to accentuate contrast even more than desired. Feel free to test out the differences with your own film camera collection. However, don't be disheartened by these findings - opting for your preferred SLR will set you on the right path for the best results!
We’re going to explore this for ourselves in the coming weeks, so keep an eye on our HARMAN Phoenix Learning Hub to discover what we learned.

Tip 6: Don’t be afraid to get close
While HARMAN Phoenix works well photographing a variety of subjects, it is particularly at ease when capturing scenes or subjects that fill the frame. It proves to be an excellent film for intimate, detailed shots, especially when the subject or item boasts rich textures and a diverse range of colours. This film is an ideal companion for macro photography to capture intricate details in subjects like foliage, animals, and nature.

Tip 7: Know what to expect from your scans
Now you’re ready to shoot your HARMAN Phoenix 35mm film, the next stage of the process needs careful consideration: developing and scanning. The way your negatives are scanned significantly shapes the visual experience of your images, and naturally, you want to ensure that your chosen lab comprehends how to highlight Phoenix's best qualities. Fortunately, HARMAN has compiled a scanning guide for labs to adhere to. However, some labs might take their own direction with the settings they apply - so it’s worth having a chat about this if you’re looking to get something in particular out of Phoenix.
Having worked closely with the HARMAN team over the past six months, our WonderLab has honed an understanding of what Phoenix needs and reflected this in our scanning service. And so, if you’re keen to get the best out of your first few rolls, it’s only natural to take the next step in the journey and develop your 35mm film with us!
Phoenix is a-go!
With all these insights at your disposal, we trust you now feel equipped with the knowledge to capture your most stunning HARMAN Phoenix images and relish the entire creative process! Embrace the imperfections of this unique film, venture out, and revel in its playful and inventive outcomes. Don't hesitate to experiment and discover the fantastic qualities it has to offer. The Analogue Wonderland and HARMAN team are always here for help and advice should you need it. We can’t wait to see what you create!
You can follow the journey of the film on the HARMAN Photo website. Want to know more about HARMAN Phoenix? Visit our Phoenix Learning Hub for all you need to know ahead of shooting this new colour film from HARMAN!
Ready to dive in?
Keep Reading
View all
Valentine’s Day Photo Prints Made Personal: From Fleeting Moments To Lasting Memories
Turn your favourite memories into tangible keepsakes to gift your loved ones this Valentine's Day, with professional photo printing at our Analogue WonderLab! Cherish, share, and frame your special moments with care, thoughtful curation, and beautiful, personalised presentation.

AW Improvement and Changes for 2026 💪🏼
See how we're going to improve our pricing, loyalty scheme, lab timings and much more in the coming weeks!

Analogue Movie Film 101 (Motion)
Subscribe to our newsletter 💌
Sign up for our newsletter to stay up to date on film photography news, sales and events:
Free Tracked Shipping
On all UK orders over £50
Passion For Film
An unbeatable range and an on-site lab
Our Customers Trust Us
Thousands of independent 5* reviews
All Deliveries are Carbon Neutral
Independently audited and verified by Planet
- Opens in a new window.


