


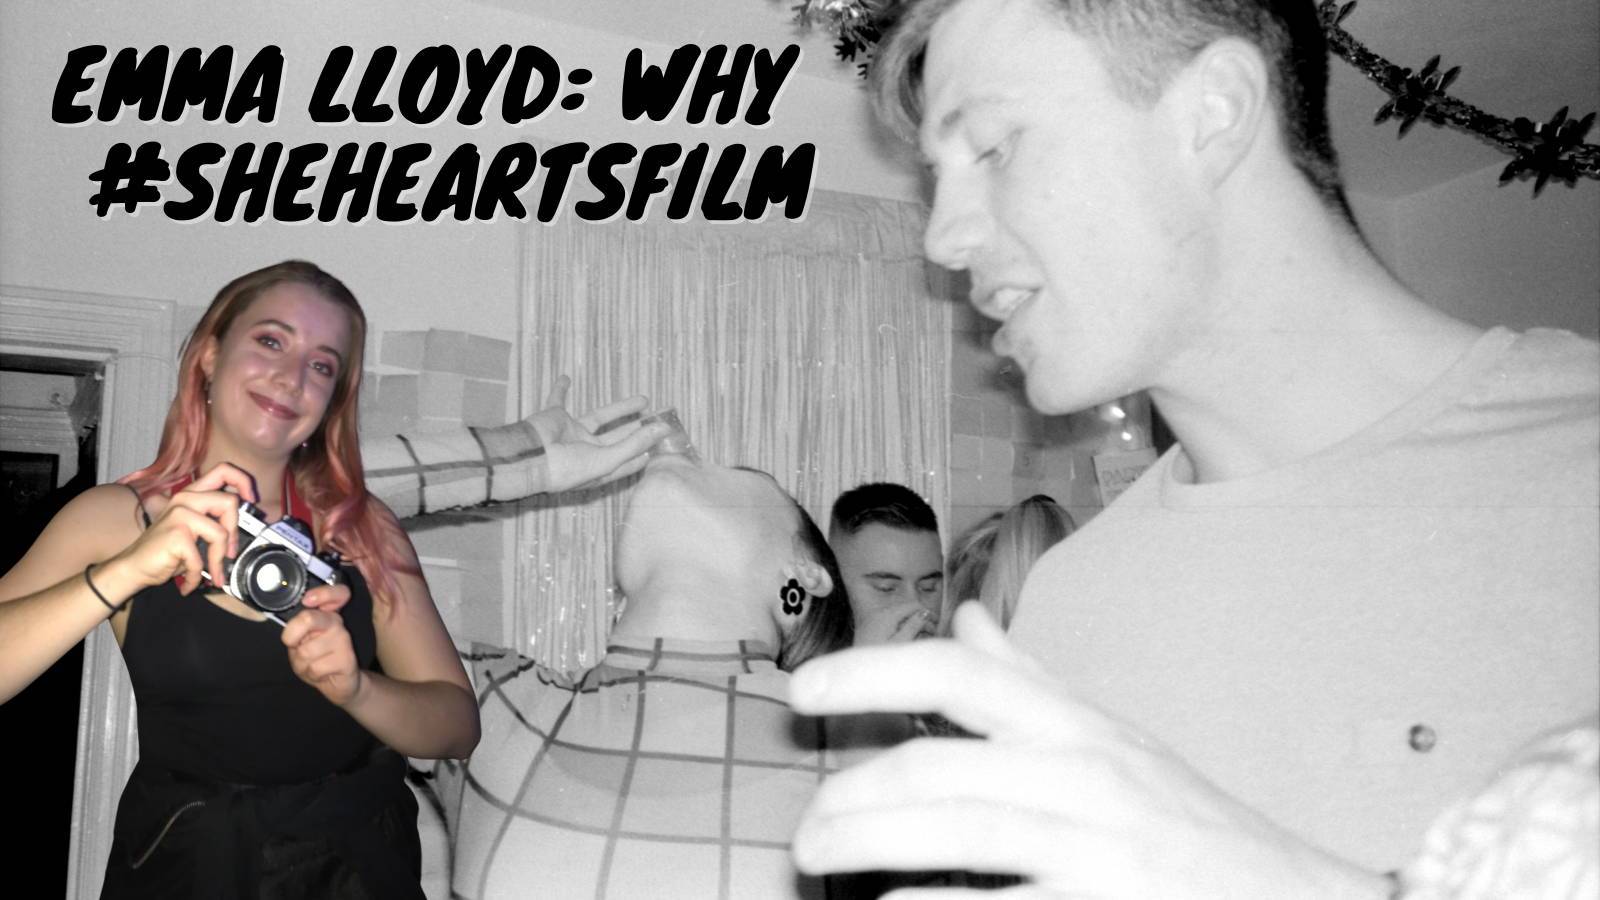
Emma Lloyd: Why #SheHeartsFilm
Today's blog is written by Emma Lloyd: one of the team here at Analogue Wonderland and a passionate film photographer. She has also been responsible - along with Emily Jackson - for the IWD celebrations this year at AW - with the creation of the #SheHeartsFilm initiative on Instagram. Here she explores a little more about her journey into film and how analogue photography has helped her personal creativity.
A thoroughly enjoyable and entertaining read! 😊
#SheHeartsFilm
Hello film lovers, welcome to my lil’ blog in celebration of International Women’s Week (month/year/ lifetime!) I wanted to talk to you all about why I fell in love with film, the versatility of film and why everyone with creative juices flowing through their veins should give film photography a go.
Maybe I am a tiny bit biased, but I think there is more creative potential and avenues to follow with film than digital. I love film and have learned so much about photography from it. I think working with film forces you to understand the fundamentals of photography - shutter speed, aperture, ISO and all that jazz - rather than to depend on the auto function of your smart phones and digital cameras.
I also feel it is important to hear the perspectives and journey of a woman in film. It dawned on me the other day that in my whole university I can only think of ONE female technician! My whole art university which employed close to 100 people. I’m not saying there is anything wrong with male teachers, in fact my photography lecturer was a man, and he was quite brilliant.
However, that is not to say that I wouldn’t have enjoyed some lady-led lessons.
I think there can be a better level of understanding sometimes, maybe a more empathetic approach and just less of the patronising and mansplaining that some men can’t seem to do without. So, before I go on a feminist rampage, in this blog I thought it would be good to share some of my experiences and experiments with film and analogue technology. I want to pass my knowledge onto other aspiring photographers (especially women), and encourage them to pick up a camera.
Back in the day
I studied fine art at Loughborough University. I only graduated last year but time is irrelevant post covid and it feels like a lifetime ago. In my second year I had my first photography workshop and was introduced to the wonderful world of film photography in all its glory, magic and endless possibilities.
Trusty HP5 film has been my go-to companion throughout my film adventures. Partly because it was what was available to me at uni and partly because I was just dipping my toes into the film world and quite honestly didn’t know what else was out there. Ilford’s HP5 is a brilliant and affordable film, which is mainly why I gravitated towards it so much as a student, but I do wish I had discovered Analogue Wonderland whilst studying, so I could have experimented more.
My first assignment was to simply ‘finish a roll of film’. I walked into town and started with a bit of street photography, taking pictures of local people in Loughborough. I really enjoyed this and found that shooting with film could be a big conversation starter - people were often more eager to have their pictures taken! It was a great way to boost my confidence as a photographer, forcing me to talk to people, ask their permission to be photographed and trying to build up a conversation which would hopefully result in a better, more authentic and intimate photograph.
As I got more confident in my film practice and subject matter, I began to see some limitations of HP5 for the nature of work I was doing. I started shooting a lot of nightlife, nights out at the students’ union, house parties, pub crawls, the classic uni chaos that I miss dearly. HP5 often wasn’t fast enough for the low light and unpredictable conditions I was shooting in.
I was desperate to keep shooting with a manual camera, we had classic Pentax K1000s at uni and I absolutely adored them! But it was the equivalent of carrying a brick round my neck at the club, and I did get some odd looks or people thinking I was working for the Union’s media section!
The Pentax didn’t have a flash either, so I needed to work with a faster film.
Pentax in the club!
Enter Ilford delta 3200...
Uni had one roll of Ilford Delta 3200 in stock! No pressure there then 😂 I was excited to get out to Friday night at the Union, Pentax in one hand and a tin of pink gin in the other.
It was definitely challenging to work in those light conditions, but I was loving it, and so excited to see the developed roll.
Until I started hearing some crunching from the camera as I wound on the film...
BIG MISTAKE
I got straight into the processing rooms as soon as I could the following week, devved, scanned, all that work and THIS!
The film had not wound on AT ALL and I ended up with just this single image, I don’t even know how many shots are in one frame. Big mistake or happy accident? I do like how you can see several different scenes from the night out. See if you can spot the girl in the smoking area.
This makes me think back to what Jon Mided said in a previous blog post. Understanding the science of film, i.e. I knew a faster film would work better for nightlife photography. But also, about the importance of choosing your tools, honing your craft and finding what works for and your subject matter.
In this case, the lesson was - well firstly don’t load film drunk 🤪 - and also that a massive Pentax camera probably wasn’t the most suitable for a night out, and that I would be better with a flash or point and shoot camera. I did learn that a faster film worked well though! But it was back to HP5 for the rest of the term.
Point and shoot shoot shoot
So, I didn’t have access to a faster film at the moment, HP5 would have to suffice. But I did have an old muji family camera. A reliable point and shoot that would be quick and had a somewhat blinding flash, making it perfect for the kind of work I was doing.
I loved being a spectator on these nights out, I’m not really a big drinker but watching the chaos of my drunken friends unfurl over the evening was always entertaining, and sometimes slightly worrying.
The muji worked perfectly. It was compact, light and always took a clear photo. Although the blinding flash often meant the faces in my pictures were over exposed, which proved interesting when trying to make darkroom prints.
Lightroom or darkroom
At this point I was hooked on film photography; I was shooting and processing a few rolls a week and barely stopping to look at the images I had taken. There was virtually no editing process at this point, but I was just enjoying the tactility of film and the excitement of processing an image.
I learnt how to scan in my images and pull them into photoshop or lightroom to get as much detail out of them as possible. I found this fascinating. Often images that had virtually no detail on the negatives at all could pull out some interesting shots, and I loved how grainy they were.
The near-blank negative...
...and the final image!
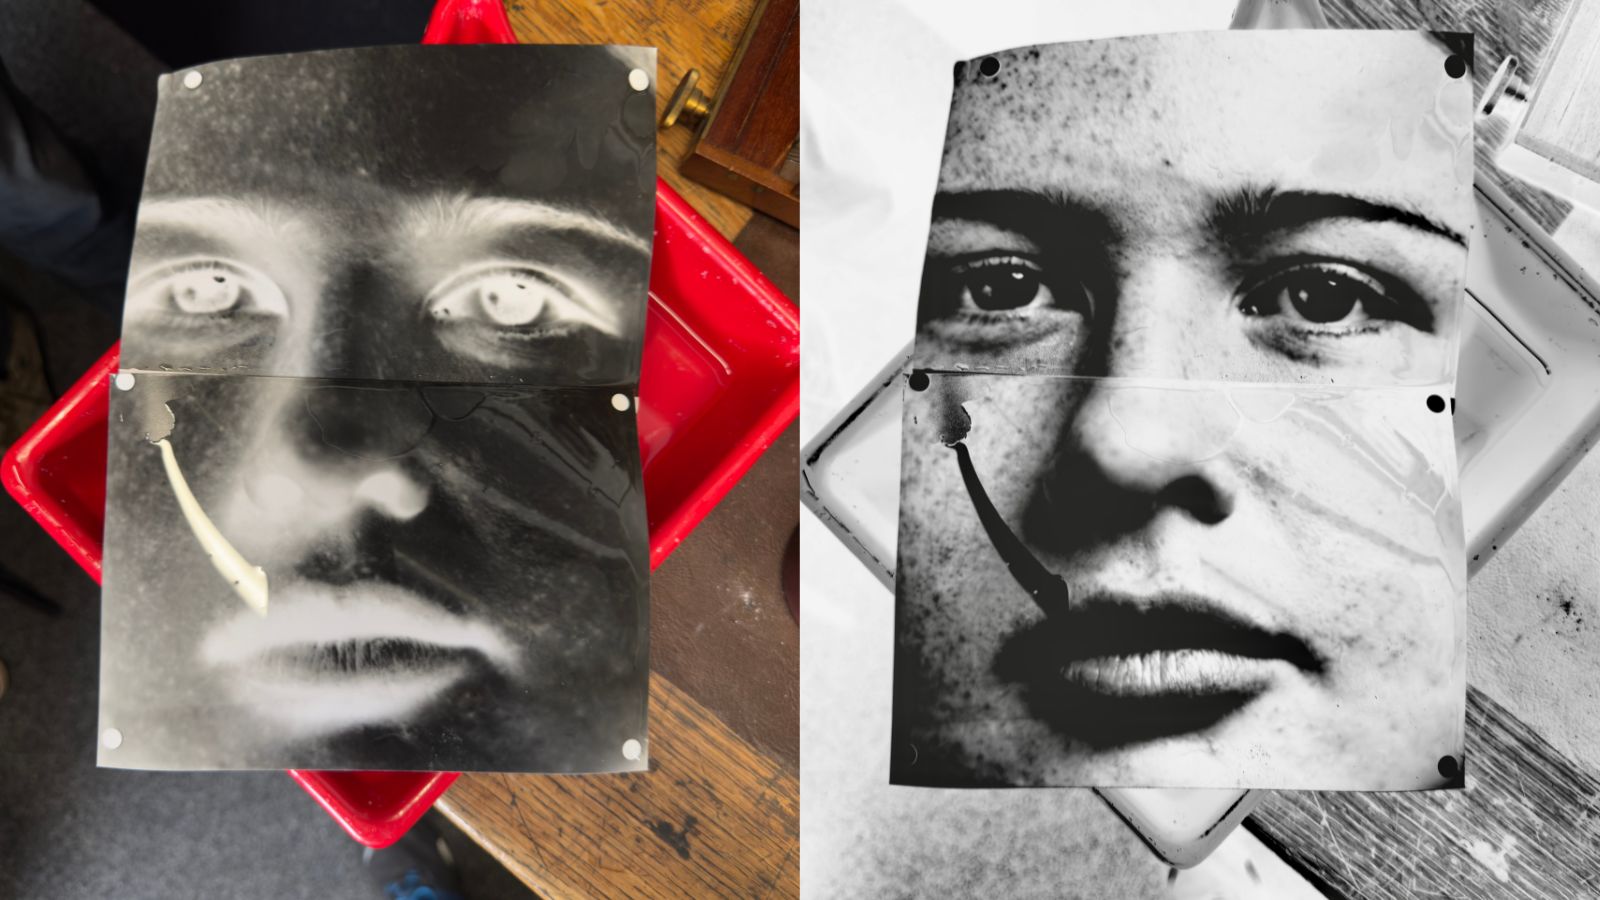
I also spent time in the dark room making traditional prints, using dodging and burning techniques (Dodging and burning are terms used in photography for a technique used during the printing process to manipulate the exposure of a selected area(s) on a photographic print, deviating from the rest of the image's exposure) to get the most technically accurate image.
It definitely took a lot of practice and patience, but I found the parallels between the digital and analogue processes interesting and could see the advantages of both.
Four prints i.e. "interpretations" of the same negative
I think often film photographers come to a bit of a crossroads here, to stick to all analogue or to implement digital technologies too. As if you will be betraying film if you choose to work with photoshop. I think this is so silly and just archaic, editing software nowadays is just incredible and we would be foolish not to use it to our benefit!
I think implementing modern technologies into film photography is what is going to keep it alive. You don’t have to pick one or the other and I would encourage people to play with both.
Abstraction and experimentation
As soon as this lockdown ends, I urge all film photographers to pay a visit to their nearest community dark room. There is most likely one near you. If you shoot film but haven’t tried printing, you’re really missing out.
I have only played with black and white printing (so far) but even with that, there is so much to play with. Here are a few of the experiments I’ve done, if there isn’t something here for you I will be surprised 😅
1. Multiple exposure
Different to 'in-camera' multiple exposures! For this one, you will need a decent size dark room with multiple enlargers. I set up different negatives on each enlarger and through dodging and burning, overlapped them with each other. By shielding areas of the paper from being exposed, you can create a photo-collage-style darkroom print.
2. Solarisation
A term apparently coined by Man Ray. This technique was allegedly discovered when Man Ray’s assistant accidentally left the door to his darkroom open, after he had already exposed an image, in turn re-exposing it for a second time.
It creates an interesting effect known as a ‘mackie line’, making the image appear almost inverted. I did a lot of experimentation with this, and found it hard to pin down a technique to achieve the same effect each time as it seemed to vary so much for each photograph.
I had the most success when slightly under exposing an image, then putting it straight into the developer tray, only long enough for the detail to just be appearing. Then, you quickly snatch it from the tray and re-expose it quickly with another light source (could be a torch, an enlarger with no negative, or quickly running outside of the dark room) and you achieve lots of bizarre and wonderful effects.
3. Chromoskaedic sabbatier
This technique is a bit risque in the health and safety department 🙄. I was enjoying it at uni, but the project quickly got shut down when my lecturer realised how toxic the chemistry was (it came in blank bottles so we had no clue until we asked the supplier for the coshh sheets, I should have been in a full hazmat suit ☣️).
The technique is called chromoskaedic sabbatier, and is an experimental silver gelatin technique developed in the 90s. It is explained well on the alternative photography website, “In short, the process lifts the silver halides in gelatin silver paper to the surface, thus resulting in a multicolour, metallic sheen on what would otherwise be a black and white print.
Colours and patterns that appear cannot be diligently controlled, rendering chromo to be an experimental and image specific process.” It basically made all my prints super shiny and mirrored, it was so cool but the chemistry smelt absolutely horrific.
4. Combining contact prints with drawings
Another technique I enjoyed was making contact prints of my drawings. In my final year I carried out a daily drawing project, where I did a quick doodle everyday summarising my thoughts and emotions of the day.
I wanted to combine this process with my work in the dark room so using photographic paper and my drawings, I took contact prints of them which inverted their appearance and gave a completely different look!
5. Liquid light
This technique was by far my favourite I tried at uni. It involves using a liquid silver gelatin, which can be applied to almost any surface, and processing that object as a dark room print.
I experimented with ceramics and tiles, making my photographs into ‘artefacts’ and physical pieces of memory. I am still experimenting with this now at home, and working on getting the washing stage right as the tiles I am using absorb a lot of the chemistry.
Endless possibilities!
There is SO SO SO much fun and creative stuff you can do with analogue processes! And that’s why I love it: the endless possibilities and outcomes. There is still so much I want to try, and I haven’t even touched much on film types or cameras!
My advice to anyone starting out is to just go for it! Building an understanding of the fundamentals of film is of course helpful, but you will learn most by just going mad with experimentation. And don’t be too precious with your work, just have fun and learn from each attempt. Lean into abstraction and enjoy the happy accidents.
I hope by sharing my film journey so far I have encouraged some of you to give it a go, and try some new techniques. Through the She Hearts Film project I would love to create a network of women and other under-represented groups, who could support each other with advice, lessons and photography tips, and the Analogue Wonderland blog page seems a great place to start!
I feel that it is important that the film community (and world) is inclusive, we build representation of all different kinds of people that can offer different experiences and perspectives. The film community will grow this way and be better off for it, we all have different stories and lessons to share. Keep being creative, sharing your work and inspiring each other, the She Hearts film project is only just the beginning!
If you've been inspired by this article and Emma's work then she'd love to see your future images on Instagram with #SheHeartsFilm and her handle @ejlloydart!
Ready to dive in?
Keep Reading
View all
Lomo 400 And A Village In The Hills
Masha set out with a roll of Lomography film, her Olympus Trip 35 camera, and the specific goal of capturing gorgeous photos of an English seaside village.

Kodak Ultramax vs Kodak Gold: Which Film is Better?
Are you stuck between choosing Kodak Ultramax or Kodak Gold film for your next project? In this post, we dive into analyzing their differences and discovering which film is better suited for you.
- Opens in a new window.