Recent posts


Shop the article


Double Your Fun: Expert Tips for Your Half-Frame Film Camera
Confession-time: I hadn't shot on half-frame until this year. But I suspect that's probably true for many analogue photographers. It is definitely a format that has exploded in popularity over the past two years - partly driven by the new cameras that have been released (or about to be 👀 hello Pentax Film Project!) and partly by the lower cost-per-image. In this article, we'll explore the ins and outs of these compact cameras and provide you with expert tips to maximise your photographic potential. From understanding the history and features of half-frame cameras to mastering composition, lighting, and maintenance - as well as learning from my personal experience - we've got you covered. So, grab your camera, load up some film, and let's dive into the world of half-frame photography!
Understanding the half-frame film camera
Before we delve into the technicalities, let's take a moment to appreciate the history behind half-frame cameras. These beautiful little devices were first introduced in the 1960s as a means to double the number of exposures per roll of film. By capturing two smaller frames on a single 35mm frame, photographers were able to capture twice as many shots without changing rolls.
Key features of half-frame cameras include their compact size, lightweight construction, and (often) default portrait orientation.

The iconic Olympus Pen half-frame camera was produced in a couple of different models from 1963 to 1970
The half-frame nature encourages us to think differently about composition. With each frame being smaller than a standard 35mm frame, you are challenged to find creative ways to make the most of the available space. This limitation can spark innovative approaches to framing and storytelling within a single shot. You can't rely on it carrying a load of detail across a landscape for example - you must be really choiceful about subject and background.
The portrait orientation isn't universal with half-frame cameras, but it is more common. The Pentax 17 has adopted this orientation; Pentax have been referring to this as the 'Instagram' orientation, and it is true that most photos taken in the world right now are in portrait mode - thanks to the ubiquity of smartphones. After years of training myself to look for 'landscape' photos on 35mm or 'square' photos with medium format, it is unusual and refreshing to start looking for tall and thin compositions instead!

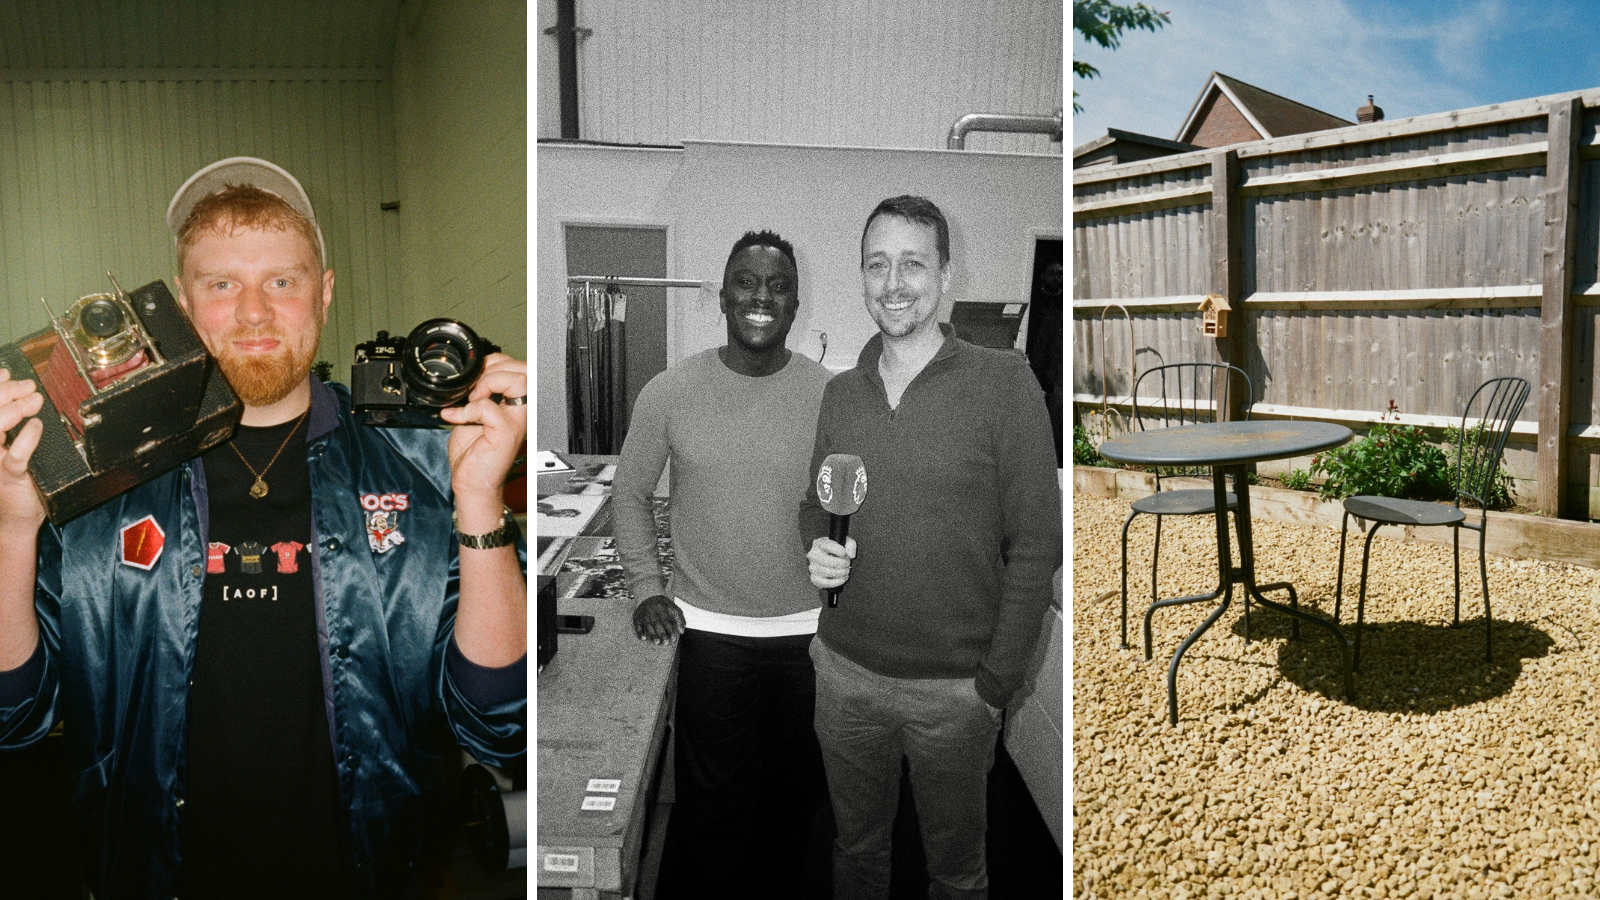
I was sat with friends when I noticed that the low sun had created a long and thin shadow pointing directly away from me... half-frame time!
I've found that the smaller size of the half-frame cameras themselves also leads to a different shooting experience compared to traditional full-frame cameras. My Ektar H35N is really light and pocket-sized so I can carry it wherever I go without worrying it'll slow me down. The increased number of exposures per roll encourages me to experiment more freely, capturing a wider range of subjects and moments without the fear of running out of film quickly. This freedom can result in a more spontaneous and dynamic photographic style.
Maximising your half-frame camera's potential
In order to make the most of your half-frame camera, it's important to consider two key factors: film choice and composition.
Half-frame cameras, with their unique ability to capture two images on a single frame of film, offer a creative and economical way to document the world around you. These compact cameras were popular in the 1960s and 1970s, providing a convenient and portable option for photographers looking to capture more moments on a single roll of film. Embracing the retro charm of a half-frame camera can add a distinctive aesthetic to your photography, with emphasised film grain and tight composition.
Choosing the right film for your camera
The type of film you choose plays a significant role in the overall look and feel of your photographs. Experimenting with different film stocks, such as black and white, colour negative, and slide film, can yield diverse and captivating results. Don't be afraid to push the boundaries and see what unique characteristics each film brings to your images.
Black and white film can add a timeless and classic feel to your photographs, enhancing textures and contrasts in a way that colour film cannot replicate - and you've got a good range of choice of different black and white emulsions. Colour negative film can bring vibrancy and depth to your images, capturing the nuances of a scene with rich tones and hues. Slide film, known for its vivid and saturated colours, can create striking and eye-catching visuals that pop off the page. Each film type offers its own set of possibilities, allowing you to tailor your photography to suit your creative vision.

I love the classic colours and timeless feel of Kodak Ultramax for 'everyday' photos like this
The other consideration is the number of exposures. Usually I'd recommend 36 exposure 35mm film - unless you're testing a new camera or new situation - but for half-frame I prefer 24! This is purely a test of my patience. Taking 72 photos (2 x 36) on film would take me a couple of weeks - whereas 48 (2 x 24) is a much more manageable number. And there are a load of fantastic 35mm films available in 24 exposures so you will still be able to shoot colour and black and white in a variety of film speeds.
Personally I've really enjoyed using Kodak colour film - knowing that it's good enough to cope with any accidental exposure triangle miscalculations!
Mastering the art of composition
When shooting with a half-frame camera, it becomes crucial to pay extra attention to composition. Since you have limited frame space, each shot needs to count. Take the time to carefully frame your subjects, experiment with different angles and perspectives, and embrace the challenge of capturing the essence of your scene in a smaller frame. Remember, sometimes less can be more.

When I saw the light glinting off the washing line I hoped that it would create enough contrast separation from the grass - and it did!
Consider incorporating leading lines, framing techniques, and the rule of thirds to create visually engaging compositions that draw the viewer's eye. By carefully composing your shots, you can transform ordinary scenes into extraordinary photographs, making the most of the unique capabilities of your half-frame camera. Don't be afraid to break the rules and experiment with unconventional compositions to push the boundaries of your creativity. With practice and patience, you can unlock the full potential of your half-frame camera and produce images that truly stand out.
Let's talk about the cost
It's time for some maths 😄
Let's assume that we buy a 36 exposure roll of colour film for £12 and shoot it in a full-frame 35mm camera. We'll develop it at the WonderLab with standard scans. This is going to be option A.
Option B is half-frame! We're going to buy a 24 exposure roll of the same film - saving £1 in the process - and when we get it developed we'll plump for the premium scans to maximise resolution. Let's see the comparison...
| A. Full-Frame | B. Half-Frame | |
|---|---|---|
| Film | Colour, 36 exposures | Colour, 24 exposures |
| Cost of Film | £12 | £11 |
| Number of actual exposures | 36 | 48 |
| Scan Size | Standard | Large |
| Cost of Develop + Scan | £12.50 | £16 |
| Total Cost | £24.50 | £27 |
| Cost per Image | £0.69 | £0.57 |
| Scan Resolution per Image | 3024 x 2005 pixels | 2850 x 4011 pixels |
As you can see, you're actually getting larger size scans but with 18% less cost!
If you didn't have my issues with shooting 72 images at one time 😅 then that cost saving gets even better: improving to a 43% lower cost per image for half-frame, with larger size scans.
Expert tips for shooting with a half-frame camera
Now that you have a good understanding of the technical aspects, let's explore some expert tips to elevate your half-frame photography skills.
When shooting with a half-frame camera, it's essential to consider not only the technical settings but also the artistic aspects that can make your photos truly stand out. Let's delve into a couple more tips to help you master the art of half-frame photography.
Getting the lighting right
Lighting plays a vital role in any photograph, and it's no different when shooting with a half-frame camera. Pay attention to the intensity, direction, and quality of light to achieve the desired mood and atmosphere in your shots. Experiment with different lighting conditions, such as golden hour or dramatic shadows, to add depth and visual interest to your images.
Furthermore, consider the use of artificial lighting sources like flash or reflectors to enhance your subject and create dynamic contrasts in your photos. By mastering the manipulation of light, you can elevate the overall impact of your half-frame images and create stunning visual narratives.

I don't claim that this particular photograph is a stunning narrative 😅 but I was grabbed by the range of colours that I knew would turn into a tonal study on Kentmere 400 - even with the necessary flash from being inside
Experimenting with angles and perspectives
One of the joys of using a half-frame camera is the freedom to experiment with angles and perspectives. Don't be afraid to get down low, climb up high, and try unusual vantage points to capture unique and captivating shots. Play with leading lines, patterns, and textures to add visual intrigue to your images.
You could consider incorporating unconventional framing techniques such as framing within a frame or using natural elements like foliage or architecture to frame your subject creatively. By exploring different angles and perspectives, you can infuse your half-frame photographs with a sense of dynamism and creativity that sets them apart from the ordinary.
Embrace Diptychs
The physical fact of shooting two images on one full frame can be deliberately used as a creative choice in itself. You can look at two different perspectives of the same subject to create a more complete capture:

I love this diptych: the colours, lighting, and the pattern of the window frames (physical in the first; shadows in the second) bind them together as a single piece of visual art

One dog; two pictures; one portrait! (c) Stevie C.
Caring for your half-frame camera
To ensure your half-frame camera stays in optimal condition, regular maintenance and proper storage are essential. This is no different from any other film cameras, but it's worth repeating!
Regular maintenance tips
Keep your camera clean by using a soft cloth to remove dust and debris from the lens and body. Regular cleaning not only keeps your camera looking flyyy but also ensures that dirt and grime do not affect the quality of your photographs. Don't forget to periodically check the battery, if applicable, and replace it when necessary to avoid any unexpected power failures during your shooting sessions.
Consider investing in a lens pen or brush to gently remove any stubborn dirt or fingerprints from the lens surface. This extra step in cleaning can make a significant difference in the sharpness and clarity of your images, especially when shooting in bright light conditions.
Storing your camera properly
When not in use, store your half-frame camera in a protective camera bag or case to prevent any accidental damage. Opt for a bag with padded compartments to ensure that your camera is secure and cushioned from any knocks or bumps while on the move.
It is also advisable to remove the film and batteries from your camera if you do not plan to use it for an extended period. Leaving film inside the camera for too long can lead to issues such as film jamming or degradation, affecting the quality of your photographs. Leaving batteries inside the camera can lead to chemical leakage and corrosion, which causes a real headache if you can't get easy access to clean. Trust me on that one!
By following these storage practices, you can prolong the lifespan of your half-frame camera and keep it in top working condition for years to come.
Developing and printing your half-frame photos
Now that you've captured some stunning shots with your half-frame camera, it's time to bring them to life through the development and printing process.
Understanding the development process
If you enjoy the hands-on experience, you can develop your own film at home using a darkroom setup. This process requires precision, patience, and attention to detail as you immerse yourself in the art of analogue photography. Alternatively, you can entrust your film to a professional lab that specialises in film processing. Professional labs have the expertise and equipment to handle your precious negatives with care, ensuring optimal results. Our lab at Analogue Wonderland can process and scan your half-frame 35mm photos for no extra cost.
Developing film is a delicate dance between chemistry and artistry. The development time, temperature, and agitation technique all play a crucial role in determining the final look of your images. Experimenting with different developing methods can lead to unique visual effects, allowing you to tailor the aesthetic of your photographs to suit your creative vision. When you scan the photos remember to make the adjustment for the different orientation and physical size of images versus 'full frame' 35mm film.

The different in half-frame (top) versus full frame 35mm film (bottom) negatives
Tips for successful photo printing
When it comes to printing your half-frame photos, consider working with a trusted lab that offers high-quality printing services. Communicate your preferences clearly, such as paper type, size, and any specific adjustments you'd like to make. Collaborating with experienced printers can help bring out the best in your images, ensuring that the colours and tones are faithfully reproduced.
Printing is the final step in the photographic process, where your images transition from digital files or negatives to tangible prints. Choosing the right paper can significantly impact the look and feel of your photographs, whether you opt for a matte finish for a classic look or a glossy surface to enhance contrast and saturation. Don't be afraid to experiment with different printing techniques to discover the perfect presentation for your half-frame masterpieces.
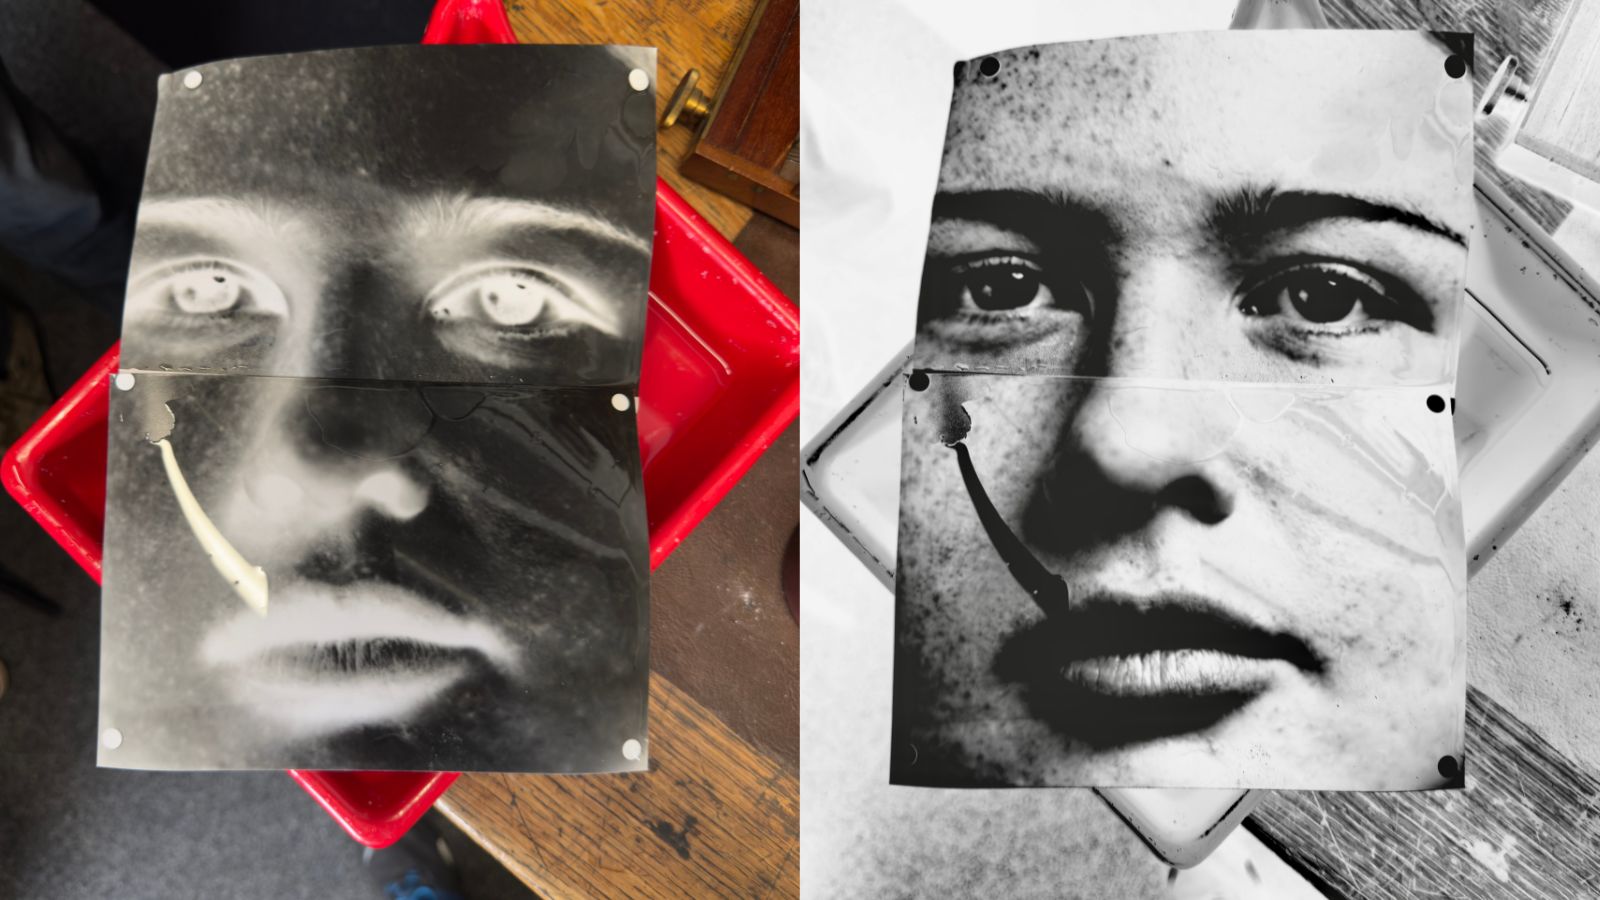
Most importantly consider that your half-frame photos will have a different aspect ratio versus full frame photos. Put simply they have a 3:4 ratio instead of 3:2.
This means that using paper in the same ratio (6 x 8 inches; 9 x 12 inches) will allow you to display your image without cropping, which is different to the 6 x 4 inches or 12 x 8 inches inches inches required by traditional 35mm film. See below!

With these expert tips in your arsenal, you're ready to unleash the full potential of your half-frame film camera. Embrace the unique qualities and challenges of this compact format, and let your creativity flow. Remember, photography is a form of self-expression, so don't be afraid to push boundaries, experiment, and have fun capturing the world through your half-frame lens.
Ready to dive in?
Keep Reading
View all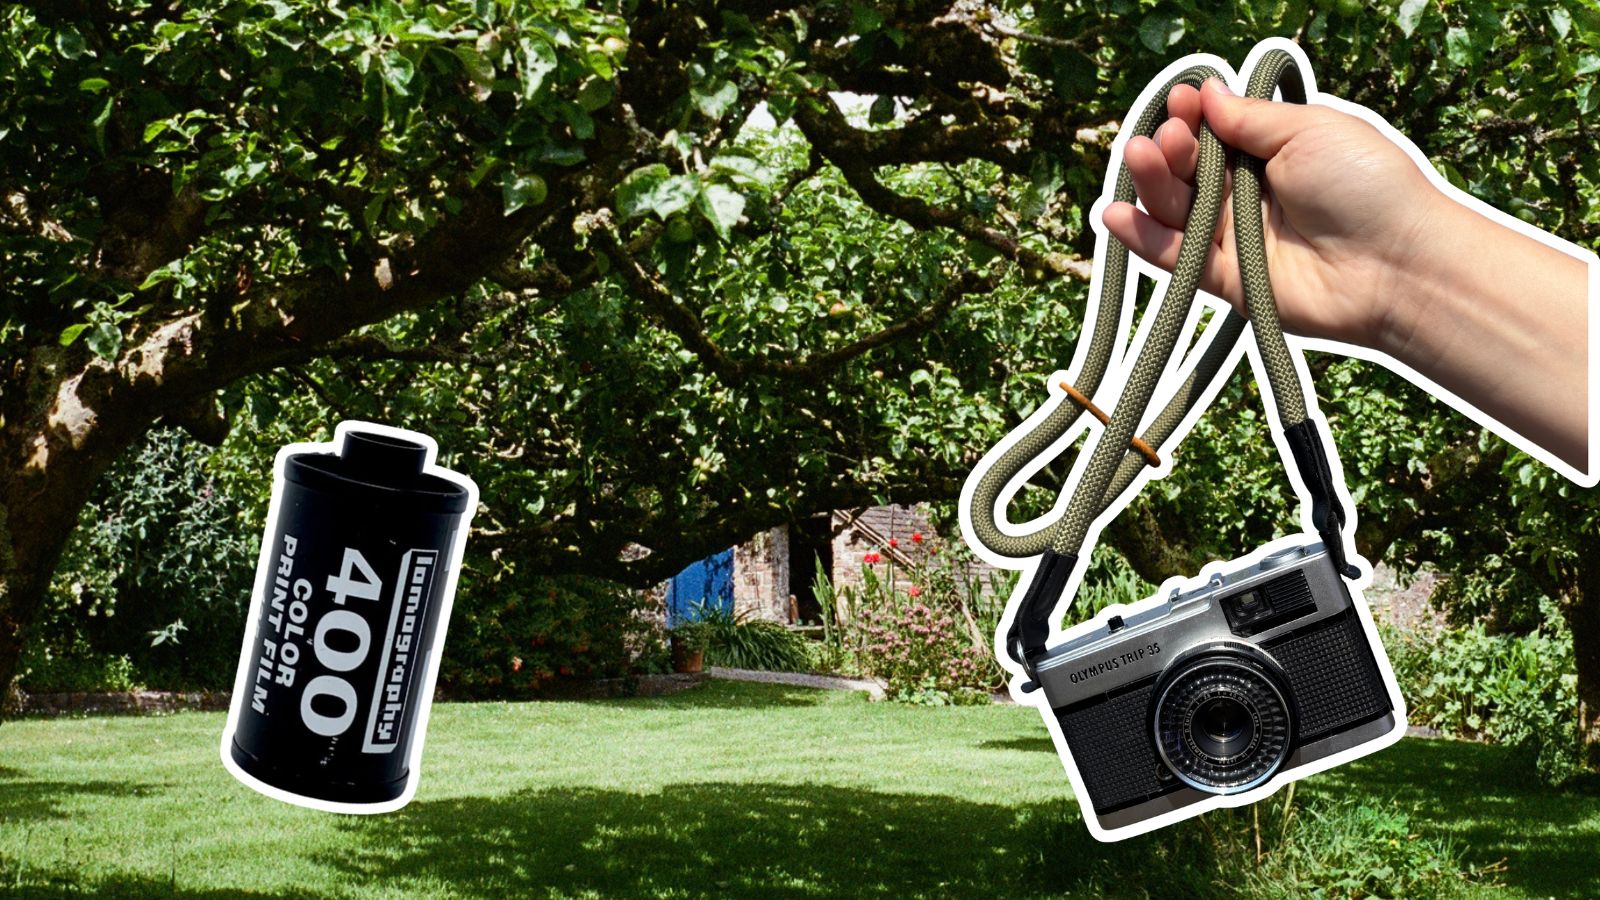
Lomo 400 And A Village In The Hills
Masha set out with a roll of Lomography film, her Olympus Trip 35 camera, and the specific goal of capturing gorgeous photos of an English seaside village.

Kodak Ultramax vs Kodak Gold: Which Film is Better?
Are you stuck between choosing Kodak Ultramax or Kodak Gold film for your next project? In this post, we dive into analyzing their differences and discovering which film is better suited for you.
- Opens in a new window.
5 Comments -
Luke Sutton • -
Jeff • -
Jeff • -
Rob Ross • -
david murray •
Good article here. Thank you. Reading up quite a bit here as I’m a video producer that specialises in manufacturing and industrial sectors. https://industreel.co.uk
Maybe I should dig out and dust off my Pentax EE2? Got talking with an Australian couple in Amsterdam recently they’d been to a huge second hand camera store in Tokyo and had picked up an EE2 (for him) and a Fuji GS645S (for her) – I’ve got one of those too!
They said their only complaint about the half frame was that photo labs wanted to charge MORE for develop and scan than they would for full frame!
That reminded me of the 1970s when I used to shoot half frame on Kodak reversal film. Had to send it off to Kodak, and pay a premium, to get it processed and mounted!
There are 3 versions of the brilliant Olympus Pen F. The F is 2 stroke as is the FT which has a built in light meter but a darker viewfinder. The FV is the final version, bright viewfinder, single stroke wind on. This was one of the first system cameras with a full range of lenses and accessories. Lenses are tiny and the body is small but NOT light. It was advertised as the only System Camera you could pack in a shoe and promoted by W Eugene Smith who made a series of 16 × 20 prints from 1/2 frame negatives.
The Pen F has a revolutionary titanium rotating shutter and is a true SLR despite not having the Norman pentaprism bulge on top.
Fabulous to use and wonderfully, classically cool.
Do check-out the work of Mick Williamson – a google will get you started. Come to think of it, Mick’s oeuvre is as close to a googol [sic] as any I can think of :-)